coconut

You are currently browsing articles tagged coconut.

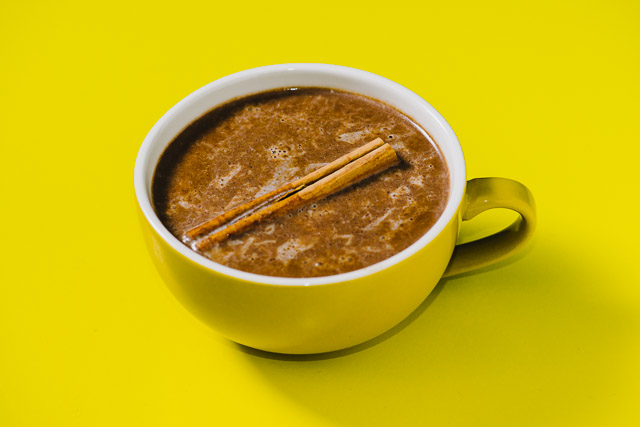
Hot Chocolate

Tonight I read a horrible blog review of one of my favourite restaurants, so, I began to feel incredibly saddened on their behalf and made myself a warm beverage as a result of that #firstworld online stress. And now I’m blogging about that thing I made as a result of blog apprehension. Circle of online life. Be annoyed by internet therefore post on internet.

I’m making a stand in not referring to this as “Spicy Coconut Hot Chocolate” up there in that title box because I care not for buzzwords or SEO. Gosh, I’m so kooky and anti-blog! My recipes are so understated and cool! Plus, I have no clever anecdote today except that I reacted in a most delicious way to something that really had no bearing on my everyday life at all. Hahah, feelings. This is spicy and salty and fatty and chocolately so indulge happily, and if you happen to be in a foul mood contemplating why you can’t help but be annoyed by annoying things in the peripherals of your career like I was, relish in its lingering chilli glory and feel it all around.

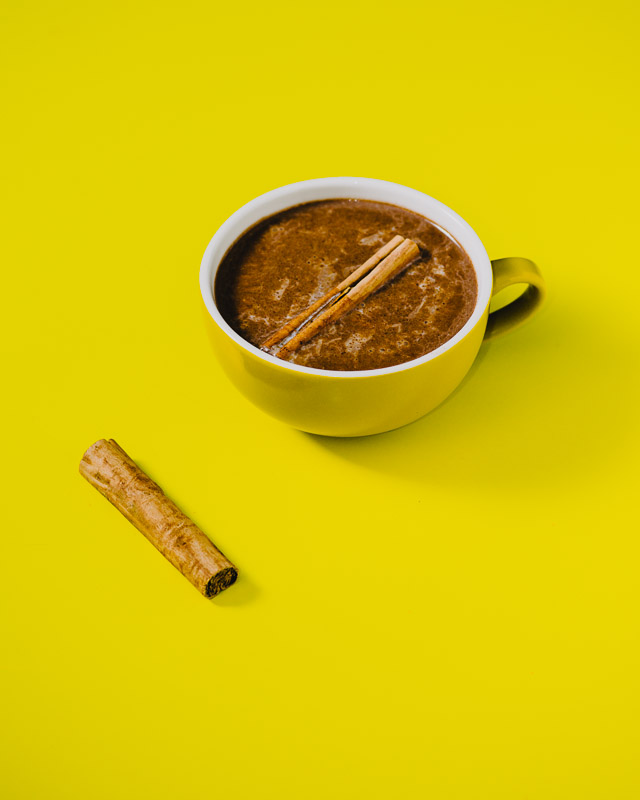
Hot ChocolateHot Chocolate


Hot Chocolate

1 cup milk
1/2 cup coconut milk
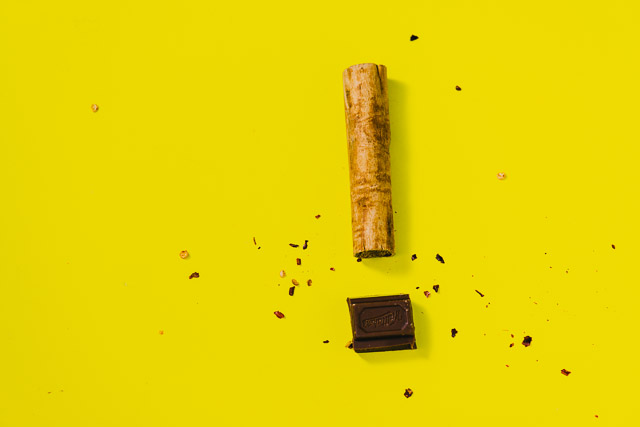
2 cinnamon quills
A few squares of chocolate
1/2 tsp dried chilli
Pinch of salt

1. Warm milk and coconut milk in a saucepan. Add one cinnamon quill and bring to the boil. Once hot enough, simmer until the milk is infused with cinnamon (around 15 minutes). Remove from heat, add chocolate and stir until dissolved (you may need to apply more heat to finish the job). Add chilli and salt, stir to combine and pour into mugs. Float another cinnamon quill on top and down that bad thing like you just don’t care.

Tags: , , ,

I’m terrible with anecdotes so to spare everyone a long-winded and poorly written story here’s a super condensed version; I was hanging with my friend Mel last week at one of our favourite establishments when I received a text message from home explaining a bag of fresh papaya was just delivered. I’m one of those annoying people who read text messages aloud and Mel must’ve seen the question marks pouring out of my ears so she began to explain all the wonderful benefits of papaya, saying she’d read somewhere its seeds are apparently peppery and delicious. Cool, right?

Thanks to my clever friend and a little dehydration action I’ve come up with this Papaya Pepper Sorbet. It’s times like these I wished I owned a little café or restaurant (my ~FOOD DREAM~) because this is one killer palette cleanser. And shout outs to my vegan pals ‘cos this is one for you! So long as you have some waiting time on your hands this is one of the easiest desserts to create; all you need is some papaya purée, coconut milk, sugar syrup and a spritz of lime. Throw in some ground papaya pepper too for a little something-something, too. It’s pretty great. And can also be made with pawpaw, or a mix of both fruits!

This makes around 8 palette-cleansing serves of papaya sorbet. If you’d prefer to serve this as a full blown dessert dish then I humbly suggest you double the recipe.

Papaya Pepper Sorbet
(an original recipe)

500g papaya, including seeds
65g (1/3 cup) sugar
80ml (1/3 cup) water
60ml (1/4 cup) coconut milk
30ml (1 shot) Malibu, or coconut rum
1 lime

For the papaya pepper
1. Preheat oven to 80°C. Halve the papaya and scoop out seeds. Spread evenly on a baking tray lined with parchment paper and dehydrate for an hour, or until the seeds are dried. Once cooled blitz them in a spice grinder.

For the papaya pepper sorbet
1. Purée papaya flesh in a food processor. Remove and place into a bowl and combine with coconut milk and coconut rum.
2. Prepare sugar syrup by combining sugar, water and juice of half a lime over medium heat until dissolved. Simmer for a few minutes until thickened slightly. Add to papaya mixture along with a squeeze of the remaining lime half. Place in the fridge for a few hours to cool completely, but ideally leave overnight.
3. Add 2 heaped teaspoons of ground papaya pepper into the sorbet mixture and prepare in ice cream maker, as per instructions. Serve immediately, garnishing with a few whole peppercorns.

Thanks to Impact Communications and Australian Papaya for the papaya and pawpaw! You guys are rad!

PS. I’ve been typing this up over the last few incredibly rainy days; the sun has finally decided to show itself today which makes me feel a little less weird about posting a sorbet. AND SPEAKING OF RAIN (clever segue), has anybody managed to get along to Vivid Sydney? Every single evening I’ve been free it has absolutely poured, last night included, but since yesterday was the finale of the festival I threw on many, many layers and braved the cold to enjoy the lights. Lovely stuff (and I’ll take any excuse to throw up a gif).

Tags: , , , ,

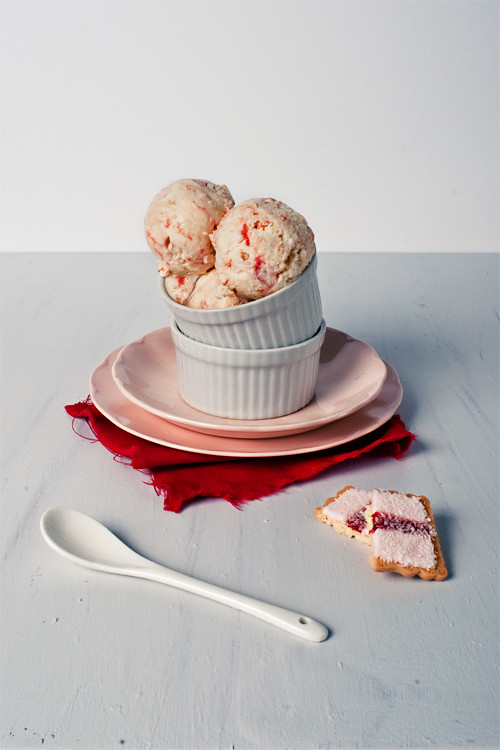
No Churn Iced VoVo Ice Cream

Making a no-churn ice cream has been on my to-do list since discovering the real me (an impatient self) so I’ve gone out on a limb dedicating this frozen experiment of convenience to some delicious Australiana. Enter: the Iced VoVo. It’s proper grouse. Ace. A real corker. ONYA MATES.

No Churn Iced VoVo Ice Cream

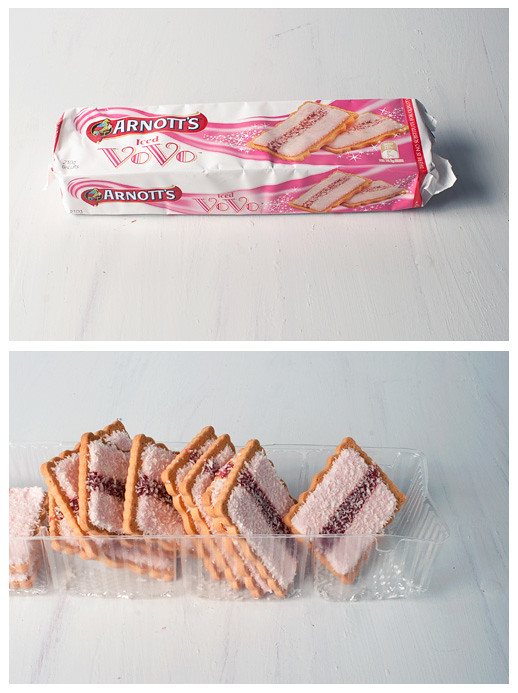
The Iced VoVo has been around for over 100 years. Breaking it down it’s a buttery biscuit topped with fondant, strawberry jam and coconut – naturally an inviting combination for the base of any ice cream. I never enjoyed the VoVo when I was younger (I had a thing with desiccated coconut) but thank goodness times and palettes change. This recipe is a bit ridiculous, but lots of fun – be warned though it’s super creamy and sweet so give your dentist a heads up before throwing this in your freezer.

No Churn Iced VoVo Ice Cream
 No Churn Iced VoVo Ice Cream
(an original recipe)

1 x 395ml can sweetened condensed milk
600ml thickened cream (around 2 cups)
300g Iced VoVo biscuits (1 1/2 packtes)
1/2 cup desiccated coconut
1/3 cup strawberry jam
1 tsp vanilla extract

1. Combine condensed milk and vanilla in a large bowl.
2. In another bowl, whip cream until stiff peaks form. Carefully fold cream into the condensed milk. Crush Iced Vovo biscuits in food processor (or with a large, heavy kitchen utensil) and combine with cream mixture along with the coconut.
3. Place jam in a small heat proof bowl and microwave for 30 seconds. Mash with fork to remove lumps (discard any large chunks of strawberry that do not budge). Drizzle over ice cream and gently swirl through. Freeze for a few hours, ideally overnight.

For those who don’t have access to these across the other side of the world I ask you, is there any sort of vague equivalent? Do tell!

Tags: , , ,

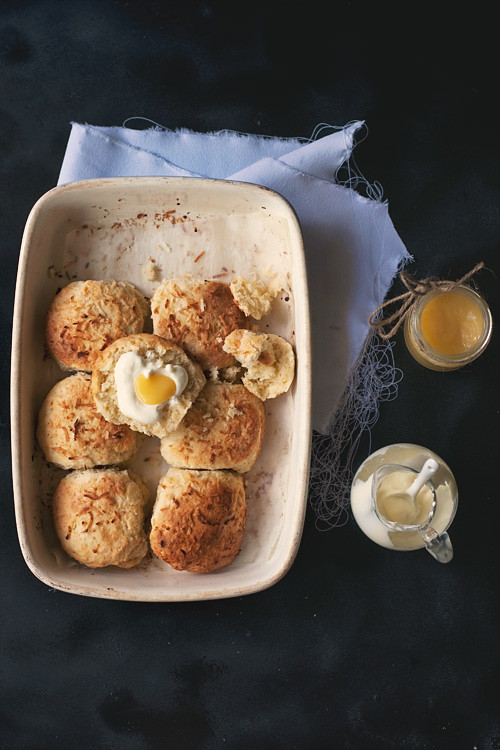
Coconut Scones + Malibu Cream + Lime Curd

Despite being a self-proclaimed “lover of baking” to my friends it’s really rather disturbing how narrow my repertoire really is. Before today I’d never made a scone before… I believe the trouble lies in my apathy for the familiar, if it’s been done I don’t particularly care for it. So, I winged it a little and came up with this cute twist on a traditional recipe.

But before we get into that here’s a little “housekeeping”.


I was given a wonderful opportunity to write a review for SBS Food a couple of weeks ago as a Featured Blog Reviewer and my little piece is up and ready to be enjoyed by all. So check it out! I’ve written about a really gorgeous book, plus the review features my square-cropped, pasty-ethnic face. Oh yeah.

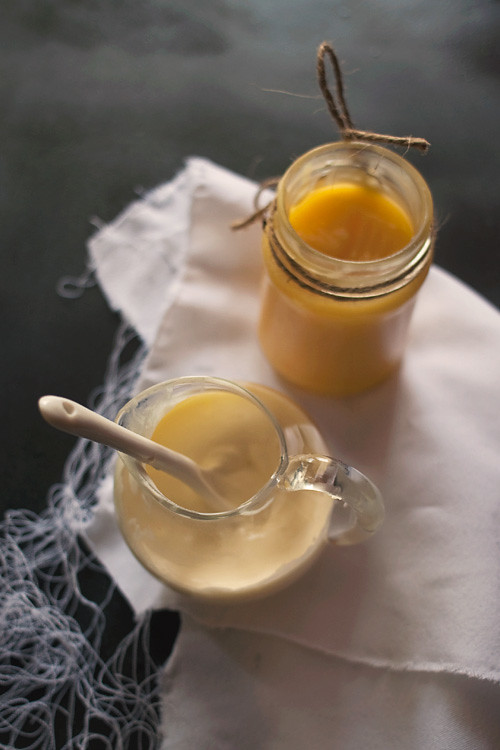
Malibu Cream + Lime Curd

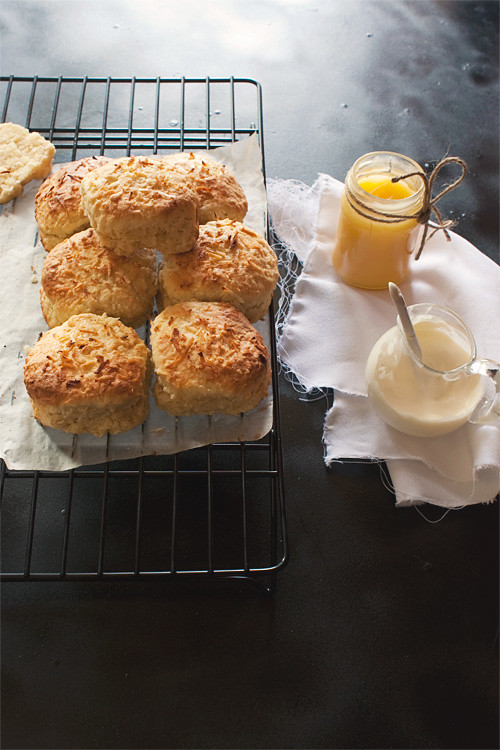
Here’s my recipe for coconut scones. Crumbly and delicious. Below-mentioned condiments are optional however encouraged and of course any fruit jam you may have on hand will work fantastically too. I’ll pull any excuse to bust out my Malibu Cream, a concoction I stumbled across as a happy, pandan-driven accident months ago. It rules.

This recipe will make around 8 scones with cream and curd to spare.

Coconut Scones
300g flour (around 2 1/2 cups) + more for dusting
100g caster sugar
2 tsp baking powder
1/2 tsp salt
75g butter, room temperature
60ml coconut milk
60ml cream
1 egg
1/2 cup flaked coconut (plus more for dusting)
2 tbs milk

Boozy Malibu Cream
240ml (1 cup) cream
30ml Malibu (coconut rum)

Lime Curd
Juice of 2 limes
2 egg yolks
40g sugar
60g butter, cubed

For the coconut scones
1. Preheat oven to 220°C. Grease and line a shallow baking dish.
2. Combine flour, sugar, baking powder and salt into a bowl. Cube butter and rub into the mixture until even. Add the coconut milk, cream, egg and flaked coconut and work with your hands until just combined (overworking the scone mixture may end in disaster).
3. Decant sticky mixture onto a well-floured board and flatten to a 2cm thickness. Sprinkle with more flour, and, with your scone cutter, remove rounds and transfer to the greased baking dish. When arranging the raw scones ensure they fit snuggly and their sides are gently pressed against one another. Brush surfaces with a little milk and sprinkle over additional coconut flakes.
4. Transfer to oven and allow to bake for 15 minutes.

For the boozy Malibu cream
1. Lightly whip cream and Malibu in a small bowl until just thickened.

For the lime curd
1. Combine lime juice, egg yolks and sugar and whisk well. Transfer to a small saucepan and place over medium heat. Stir continuously and gradually add cubes of butter until beginning to thicken (this should take only a few minutes). Remove from heat, continue to stir for 30 seconds more and transfer to a jar or container of your choice. Chill in the refrigerator.

For the assembly
1. Carefully halve your scone. Add a dollop of Malibu cream and a lick of lime curd and enjoy.

Coconut Scones + Malibu Cream + Lime Curd

And yes, I am well aware this combination of cream and curd results in a little faux-egg atop your scone. SOZLOL!

EDIT: Just had one of these with strawberry jam. OH BABY.

Tags: , , ,


This post is dedicated to the Australian Women’s Weekly Children’s Birthday Cake Book. Shout outs to my Australian pals!

Hopefully for those living in the great sunny land down-under this image should stir nostalgic delight within each and every one of you.


Perhaps I should explain for my international friends. This book was held precious to many families in the 90s with its simple instructions and how-tos for creating adorable cakes. It’s so popular that a commemorative Vintage Collector’s Edition was released in Februrary this year. It’s so popular it has a number of Facebook fan groups and fan pages. It’s so popular this book has barely aged; it’s incredible to see how many people continue refer to this gem of a book for fun cake ideas. It’s simply amazing.

Amongst its pages of how-tos for the Teddy Bear cake, Train cake, Piano cake and Butterfly cakes lies the most infamous cake of all – The Swimming Pool cake. It was every kid’s dream cake when I was younger, and why wouldn’t it be? Delicious cake slathered in buttercream and jelly (or jell-o for my American pals) covered in lollies and candy. It was a dream come true. I might go as far as to call this an Australian Icon.

Thankfully, however,  the culinary world has evolved from using algae-green jelly and nailpolish as decorating components.

My version is a little different from the recipe listed (I didn’t use “1 packet butter cake mix”, for example) so here’s my step-by-step guide to creating this iconic Australian cake. It’s best started a day in advance to prepare the cake, and more importantly the blue jelly. I hope you have lots of lollies ready in your pantry!

Swimming Pool Cake

(Alana’s Illustrated Guide)

1. BUY LOLLIES AND CANDY. Blue jelly, desiccated coconut, Teevee snacks (or long chocolate covered biscuits), jelly babies, gummy bears, snakes, kool mints and cocktail umbrellas. GO NUTS!

2. Prepare blue jelly according to packet instructions. Place in fridge and allow to set completely.

3. Prepare a 9-inch round cake. I used my standard vanilla cake recipe and added a chocolate swirl by adding a little cocoa in some of the remaining mixture. Once baked (180°C for around 50 minutes), wrap in plastic so it doesn’t dry out and place in the fridge until your jelly is ready.

4. Remove cake from fridge. With a sharp knife trim the cake to remove the dome that has probably formed in the baking process to create a nice, flat surface.

5. With the sharp knife, cut around the top in a circle to represent the wall of the swimming pool. Hollow out the centre if the cake to form a recess for the jelly.

6. Prepare chocolate buttercream by beating 125g butter, 1 1/2 cups icing sugar, 50g melted chocolate and a tablespoon of cocoa. Spread around the cake covering the edges and around the wall of the recess.

7. Prepare green coconut “grass” by combing desiccated coconut with a few drops of green food colouring. Gently place or spoon around the rim of the cake ensuring not to spill any on the sides (a little overflow is fine though as they will be covered by the biscuits). I know it’s looking a little silly now but just bare with me, it will be worth it, I promise!

8. Create the fence of the pool by arranging the Teevee snacks (or biscuits sticks) around the edge of the cake. Be sure to leave a 1 1/2 inch gap to make room for the ladder.

9. Construct the ladder out of must sticks and thin candy strips, I used thin sour laces. Use a little of the buttercream to attach the pieces and lean against the cake.

10. Remove your set jelly from the fridge and mash with a fork to represent water. Carefully spoon into the crevice of your cake, ensuring you don’t spill any onto the coconut grass (once it sticks, it stays!).

11. It’s time for the decoration! Adorn your cake with cocktail umbrellas, jelly babies, gummy bears, kool mints for balls or anything else you like. I had my brother make create some lounging jelly babies floating in pool toys constructed from snakes. Place them in and around the pool edges!


Note: you may have a LOT of sweet treats leftover if you bought as much as I did.

It’s a sight to behold, isn’t it? It’s just so adorable taking a knife to is seems almost blasphemous…

NOOOOOOOOOOOOOOO-

Oh well. Good night, sweet prince.

You were everything I ever dreamed of and more as a 5 year old.
Tags: , , , , ,