cinnamon

You are currently browsing articles tagged cinnamon.

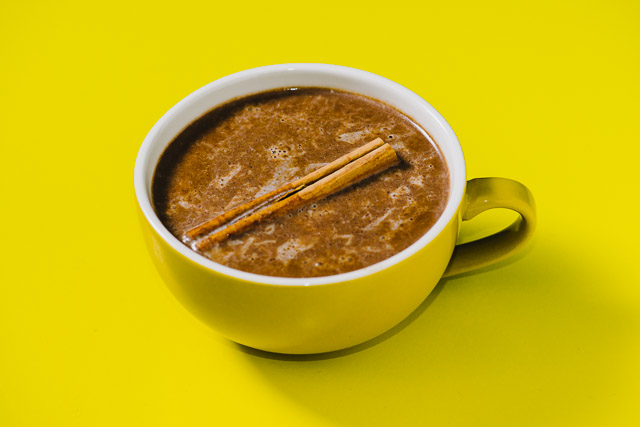
Hot Chocolate

Tonight I read a horrible blog review of one of my favourite restaurants, so, I began to feel incredibly saddened on their behalf and made myself a warm beverage as a result of that #firstworld online stress. And now I’m blogging about that thing I made as a result of blog apprehension. Circle of online life. Be annoyed by internet therefore post on internet.

I’m making a stand in not referring to this as “Spicy Coconut Hot Chocolate” up there in that title box because I care not for buzzwords or SEO. Gosh, I’m so kooky and anti-blog! My recipes are so understated and cool! Plus, I have no clever anecdote today except that I reacted in a most delicious way to something that really had no bearing on my everyday life at all. Hahah, feelings. This is spicy and salty and fatty and chocolately so indulge happily, and if you happen to be in a foul mood contemplating why you can’t help but be annoyed by annoying things in the peripherals of your career like I was, relish in its lingering chilli glory and feel it all around.

Hot ChocolateHot Chocolate


Hot Chocolate

1 cup milk
1/2 cup coconut milk
2 cinnamon quills
A few squares of chocolate
1/2 tsp dried chilli
Pinch of salt

1. Warm milk and coconut milk in a saucepan. Add one cinnamon quill and bring to the boil. Once hot enough, simmer until the milk is infused with cinnamon (around 15 minutes). Remove from heat, add chocolate and stir until dissolved (you may need to apply more heat to finish the job). Add chilli and salt, stir to combine and pour into mugs. Float another cinnamon quill on top and down that bad thing like you just don’t care.

Tags: , , ,

Salted Spiced Beer Caramels

A few weeks ago I enthusiastically jumped aboard my beer-wife high-horse and purchased a dozen Brewdog There Is No Santa beers. In retrospect this was a little strange as traditionally I only revel in beers that taste overwhelmingly of fruit and unfortunately this purchase was no exception to my girly tastebuds; despite its charming notes of cinnamon and spice I could only bring myself to drink the one.

Salted Spiced Beer Caramels

However with my glass (stein?) half-full I chose not to see this as a frivolous purchase but as an opportunity to adapt this wonderful beer to the culinary world.

Salted Spiced Beer Caramels

Drawing inspiration from my Framboise Caramels I hoped to achieve a similar chewy and delicious beer-based morsel. With the addition of of some spice to heighten the essence of this micro-brewed Christmas beer you’ll have salty, sweet, buttery, bitter and spicy flavours partying all up and around your mouth. And isn’t this what flavoured caramel is all about?

Salted Spiced Beer Caramels

Shout outs to all fellow beer and candy fans. Oh, and to people who own candy thermometers, shout outs to you too. Seriously! Please don’t try this recipe without one; unless you are Lord of the Fluke the consistency of the caramel won’t turn out as nicely as you’d like so just don’t. Please? Ok good. I’m only harsh because I care. Mwa mwa! This recipe makes around 40 caramels, depending on the size.


Salted Spiced Beer Caramels

(an original recipe)


1x 330ml bottle spiced beer (I used Brewdog’s There Is No Santa)

2/3 cups cream

2 tbs sea salt flakes + more for garnish

1 tsp cinnamon

1 tsp ground ginger

1/4 tsp ground cloves

1 1/2 cups sugar

1/3 cups corn syrup / glucose

120g butter, cubed


1. Pour beer into small pan and simmer over medium heat until reduced to 1/3 cup. This should take around 20-25 minutes. Place in fridge (or freezer) to cool.

Salted Spiced Beer Caramels

2. Line a square tin with baking paper. Once your reduced beer has cooled combine with cream, salt, cinnamon, ground ginger and ground cloves. Stir well.

3. Combine sugar and corn syrup over low heat until dissolved. Increase heat until syrup has caramelised – 112°C on your candy thermometer. Do not stir during this process or the syrup will crystallise.

4. Remove from heat and slowly pour in your cream mixture, stirring quickly as you do so. Be careful has the concoction will try to splutter everywhere. Continue to stir to break up the caramel ball formed whilst adding the cubed butter. Don’t worry if you’re unable to dissolve everything.

5. Return to low heat and stir frequently until the temperature reaches 120°C on your candy thermometer.

6. Pour caramel into prepared tin and allow to cool slightly. Sprinkle with rock salt and allow to cool completely – either overnight on your kitchen bench or in the fridge to speed up the process. Cut into small squares and wrap with baking paper, twisting at the ends like traditional candies. Sprinkle with more rock salt if desired.

Salted Spiced Beer Caramels

BRB, MAKING AN APPOINTMENT WITH THE DENTIST (and possibly AA).

Tags: , , , ,

It’s December! Which marks this month as my very first Christmas as a recipe/food/baking/WHATEVER blogger – all photography from here on in will feature GREEN, RED, CUTENESS, SPARKLES, BAUBLES, etc etc.

Tonight I’m off to an annual Christmas  dinner with my old school friends. Traditionally we give each other small, cute gifts. Last year I made some sugar cookies and fudge however to celebrate this blogging landmark as a vaguely serious baker I figured it was time to step up my game.

At first I was dubious of baking with such a wintery flavour in (what should be) the beginning of Summer here in Sydney however thanks to much unprecedented and rain below-average temperatures I had no qualms whatsoever getting my gingerbread on. This recipe should make around 20-25 macarons, depending on the size.

GINGERBREAD MACARONS

(an original recipe)

 Gingerbread Shells

100g egg whites, room temperature

100g almond meal

200g pure icing sugar

30g caster sugar

1 tsp powdered egg whites

1 heaped tsp ground ginger

Powdered/gel colouring

White Chocolate Ginger Ganacahe

200g white couverture chocolate, chopped

100ml pouring cream

1/2 tsp cinnamon (plus extra for dusting)

1/2 tsp ground cloves

2 tsp ground ginger

2-3 lumps of crystallised ginger (around 10g), finely chopped


1. Preheat your oven 150°C.

2. Sift pure icing sugar, almond meal and ground ginger and place into a bowl and give it a quick stir.

3. Beat eggwhites and eggwhite powder in a separate bowl until soft peaks form. Slowly add the caster sugar, beating well between each addition, until eggwhites are stiff and glossy. This process should take around 5-10 minutes.

4. Pour half of your dry ingredients and colouring (I used half brown half orange gel colour) into the bowl of beaten eggwhites and combine with a flat utensil, like a spatula, using “cutting strokes”. Once incorporated repeat with the remaining icing sugar and almond meal mixture. This is where things begin to get a little tricky as under-mixing or over-mixing will ruin your macarons as they attempt to rise and “grow feet” in the oven. Experts say to stir the mixture until it becomes the consistency of lava. The mixture will be sticky but you’ll know it’s ready when, upon holding your spatula above the bowl, it will begin just begin to flow freely back into the bowl. You’ll need to knock a lot of the air out of it.

5. Prepare a piping bag with the appropriate tip (around 1 cm or less), a baking tray with baking paper, and pipe small rounds (they must be small enough to balance on the cupcakes!). If there are any small lumps left from piping wet your finger and gently press them down (unlike cake batter, macaron mixture does not flatten out when in the oven). Dust some extra cinnamon over the shells and allow tray to rest for 30 minutes.

6. Place baking tray in the oven and allow to bake for around 15-20 minutes (this time will depend entirely on your oven, so keep an eye on them). Within 5 minutes or so they will begin to grow feet.

7. Once ready, remove from oven, and after 5 minutes transfer to cooling racks.

8. Whilst your shells are cooling place your cream in the microwave for 30 seconds or until relatively hot. Pour your chopped chocolate into the bowl and stir continuously until the chocolate has melted and the mixture is combined. Add cinnamon, ground cloves, ground ginger and finely chopped crystallised ginger and stir to combine. Place bowl into the refrigerator to cool and thicken.

9. Prepare another piping bag with a large tip and neatly pipe rounds of ganache into half of the shells. To close, gently place its partner shell on top of the ganache and twist shut, taking care to prevent ganache spilling over the edges.

As well as these macarons I’ve also bundled some of my berry and vanilla infused vodka in adorable little jam jars complete with mini baubles (a fluke discovery at Coles this morning!) – a cute reminder that a cocktail-fueled Summer is just around the corner… maybe.

Sugar and alcohol. Spice and berries. Here’s hoping they like my little edible trinkets!
Tags: , ,


Hey there sugar cookie! I have such a love hate relationship with you. Sometimes you’re adorable and cute, sometimes you’re oozy and shapeless. Sometimes you’re so chewy and delicious, sometimes you’re dry and just plain nasty.

These things are so hit and miss so when I was asked to make a Movember themed thing for a bakesale I was determined to get these cookies right. With a little help from some spice and a simple freezer I present to you my no-fail recipe and tutorial to creating perfectly shaped sugar cookies! They’re perfect for holiday events or themed garnishes, or both! This is also an easy way of creating two biscuit flavours from the same batch of dough. This should make around 30 movember cookies, depending on the size.


Basic Cinnamon + Chocolate Movember Cookies

(an original recipe)

120 g butter (at room temperature)

1 cup sugar

1 egg

2 cups flour

1/2 tsp baking powder

2 tsp cinnamon

1 tsp vanilla extract

pinch of salt

1 tbs milk (optional)

2 tbs dutch-process cocoa


1. Beat butter until it begins to pale. Add sugar and beat until fluffy. Add egg and beat until combined.

2. Add flour, baking powder, cinnamon, vanilla and salt and continue to beat until completely combined. The mixture should begin to come together but of it seems a little crumbly add the milk.

3. Remove half of the mixture, flatten into a disc, cover with plastic wrap and place in the fridge.

4. Add the cocoa to the remaining dough in the bowl and mix until completely combined. As with the earlier half, flatten into a disc, cover with plastic wrap and place in the fridge to firm.

5. Preheat your oven 160°C.

6. Remove dough, one disc as a time, and roll out to around half a centimetre thickness. Stamp out shapes with your cutter of choice, place on a tray lined with baking paper and, once full of shaped cookie dough, immediately place in the freezer for around 20 minutes. This is the most important step to ensure your shapes remain in tact once placed in the hot oven! Otherwise they’ll just ooze and end up looking like an ordinary, misshapen cookie (no disrespect to all the delicious, rustic cookies out there).

7. OPTIONAL: If you have any additional stampers or or textures to add to the cookies, do this now right before placing in the oven.

8. Place in the oven and bake for around 8-12 minutes, depending on the size. You’ll know when to remove them when they begin to brown around thr edges. After 5 minutes, remove tray and transfer cookies to a cooling wrack.

Now they’re ready to decorate! I embedded them in some buttercream-covered pandan cupcakes and added cachous for eyes to make little faces (a good idea in theory however they ended up looking like the Pringles logo in cupcake form. HOW EMBARRASSING).

And I may have had a little too much fun with them too.

I’d like to congratulate everyone who has participated and donated to such a fantastic cause this year. A number of friends took part in this and, despite a little self-consciousnes, did a really excellent job by embracing the mo’. So until next year, happy Movember!

EDIT: A few people have been asking where they can find these cookie cutters and stampers. I’m using the Munchstache set by Fred & Friends; they seem to be available all over the place so have a Google!

Tags: ,

Before I begin my usual selfish ramble about how wonderful food is I need to thank Diana of Diana’s Desserts for this incredible apple cider baked donut recipe. I’ve seen the term “Apple Cider Doughnuts” wafting about food blogs like crazy as of late but after some investigation I’ve found most of them seem to stem from this recipe. So thank you, Diana, this recipe is amazingly delicious for something so simple (and since I busted my handmixer the other day this recipe was an absolutely blessing to my unfortunate circumstance).


I’ve added my own garnishes to these lovelies (because what’s the fun in cooking straight from a recipe?); my simple apple cider glaze and apple bark. It’s important to use a good quality apple cider here as it is the only wetting agent for the glaze (so if you were considering using Strongbow kindly close this browser now :)). And as for my apple bark – this was a complete(ly successful) afterthought that went down a treat providing a welcomed crunchy tang.  You may want to organise this a few hours prior to baking your goods as it will need around 3 hours in the oven.

As you can see I’ve used donut pans, mini donut pans and a baby cupcake tin so in the spirit of concise headings I’ve umbrella’d these delicious gems under “baked goods”. This recipe does not discriminate against shape!


APPLE CIDER BAKED GOODS + CIDER GLAZE + APPLE BARK

Apple cider baked goods (from Diana’s Desserts)

2 cups plain flour

2 tsp baking powder

1/2 tsp salt

2 tsp cinnamon

1 egg

2/3 cup packed brown sugar

1/2 cup apple sauce

1/3 cup maple syrup (or maple flavoured syrup)

1/3 cup good quality apple cider

1/3 cup vanilla yoghurt

3 tbsp vegetable oil


Apple cider glaze

1 cup icing sugar mixture

1/2 tsp cinnamon

1/4 cup good quality apple cider


Apple bark

1 apple

springkling of cinnamon

For the apple cider baked goods

1. Preheat oven 180°C.

2. In a large bowl combine flour, baking powder, salt and cinnamon.

3. In another bowl combine wet ingredients; beaten egg, brown sugar, apple sauce, maple syrup, apple cider, yoghurt and vegetable oil. Give them a quick whisk then add your bowl of dry ingredients. Whisk until just combined.

4. Divide your mixture between pans/tins of your choosing. For a donut pan bake for 10 minutes, for mini donuts and baby cupcakes bake for 5-7 minutes or until the tops spring back when touched.

5. After 5 minutes transfer to a wire rack and allow to cool completely.

For the apple glaze

1. Combine icing sugar, cinnamon and cider in a small bowl and stir well to remove any lumps.

For the apple bark (do this the morning before)

1. With a sharp vegetable peeler peel thin strips of apple, including the skins, and place on a baking tray. Sprinkle with cinnamon.

2. Bake in a cool oven (around 80-100°C) until completely dried, between 2 -3 hours. (If you are doing this day before you may need to re-crisp your apple bark for half an hour before assembling). Once dried, the apple skins will shrink and curl like little twigs. The apple strips will look like leaves.

For the assembly

1. Hold your baked good up-side-down and dip into the glaze. Shake of any excess and place back on the wire rack. Take a piece of apple bark and place on baked good while the glaze is still wet so it stays in place once dried. Continue with the rest of your donuts and baby cupcakes.


Bring these along to any dinner party and they will be very, very well received.


Trust me; I know from experience.

Tags: , , , , , , ,