chocolate

You are currently browsing articles tagged chocolate.

Miso Banoffee Tart

HATE MAIL, GUYS. Am I right? You know those inconsiderate messages that crop up on occasion from people you’ve never met to tell you your photos are bad or your macaron recipe sucks? So invigorating, so inspiring – more enjoyable than an on-trend Sydney burger and a rare #craft #beer on a breezy Summer’s day.

Hahah jkz, I’m projecting, it’s uncomfortable and makes me sad. But after said sadness subsides those comments often make me laugh and thankfully I don’t encounter enough of them to break my gentle heart. This miso banoffee recipe was recently created for Visa AU to share across their social channels of 17 million fans which is both beautiful and horrifying – I was literally a sponsored tweet. With the acclaim of many likes and shares comes the occasional “looks disgusting lol” comment, sending me into a tailspin of offline self-reflection for a good 5 minutes. Spreading your wings on the internet and watching them burn is the plight of the content creator yet, like many, I continue to bless this mess that has become my internet home.

Moving forward (not backward, upwards not forward), let’s deconstruct this salted mashup. Inspired by a tremendous miso caramel shake from Milkbar by Cafe Ish in Redfern I replaced all salted notions with miso paste. So umami! So exotic. It even almost falls into the Donna Hay-esque cheat’s recipe category: store bought biscuits and caramel make this too easy. Miso makes it taste fancy and edible flowers make it look fancy. Smoke and mirrors, except it actually makes for a decent dessert. Once stacked let the whipped cream inspire you as a blank canvas just waiting for embellishment of whatever you see fit. Depending on the size of your tart ring this recipe may make a little too much – but if that’s the case you can create a deconstructed version by layering each element in a parfait glass with the leftovers.

I’m posting this a day after new year’s, so hurl your fleeting resolution of eating well out the window and get on this tart. Somebody in the comments announced they’d made it once and are making it again for friends shortly. Great internet success!

Miso Banoffee PieMiso Banoffee TartMiso Banoffee TartMiso Banoffee TartMiso Banoffee TartMiso Banoffee Tart

Miso Banoffee Tart
400g digestive biscuits
200g butter
2x tins Top n’ Fill Caramel (or, 2 tins condensed milk turned into dulce de leche)
4-5 tsp white miso paste
6 bananas
400g thickened cream
1 small block of dark chocolate
Cocoa and edible flowers, to decorate

1. In a large bowl, melt the butter in a microwave. In a food processor, blitz the digestive biscuits until they’ve turned into crumbs. Pour the crumbs into the melted butter and stir until completely combined and resembles the texture of damp sand.

2. Grease a tart tin with canola spray or butter and gently press the biscuit and butter mixture into the tin to create the tart base. Put in the fridge for at least 30 minutes to firm up.

3. In another bowl combine the caramel and miso and whisk until smooth. You can adjust with as much or as little miso as you please – but it should be nice and salty as it will be balanced out with the fresh bananas and cream. Set aside. In a separate bowl whisk cream to soft peaks and also set aside.

4. Remove tart base from the fridge and gently ease it out of the tin. Place it on the platter or cake stand of your choosing and fill with caramel until it almost reaches the rim. Roughly chop bananas into thick slices (this should be done last minute so they don’t brown) and tumble them over the caramel. Gently add large spoonfuls of cream on top. Allow to set in the fridge for at least half an hour before serving.

5. To decorate, create chocolate shavings by running a sharp knife along the edge of the block of chocolate. Dust the tart with cocoa, then scatter with chocolate shavings and finally adorn your dessert with edible flowers. If it’s a little messy when slicing, don’t worry – just dust the plates with more cocoa and decoration.

Tags: , , , , , , ,

I can’t tell you why I feel it all around whenever I hear the word affogato. The mere thought of that holy combination of life giving caffeine and a dairy-based dessert gets me weak at the knees and foggy in the head. Perhaps it’s old memories of my dad pressing ice cream into latte glasses with the gaze and conviction of a man on a mission, or maybe it was that time in Italy in 2008 when I asked a friend to order me an affogato, and once I returned from a neighbouring ATM I caught her pronouncing “aff-row-JAHHHH-teee” with such gusto only to have everybody within earshot laughing so loud she refused to speak to me for a while. I’m sorry. But I still say “aff-row-JAHHHH-teee” sometimes.

Or, maybe it’s because I know how to do fake ice cream on cakes well.

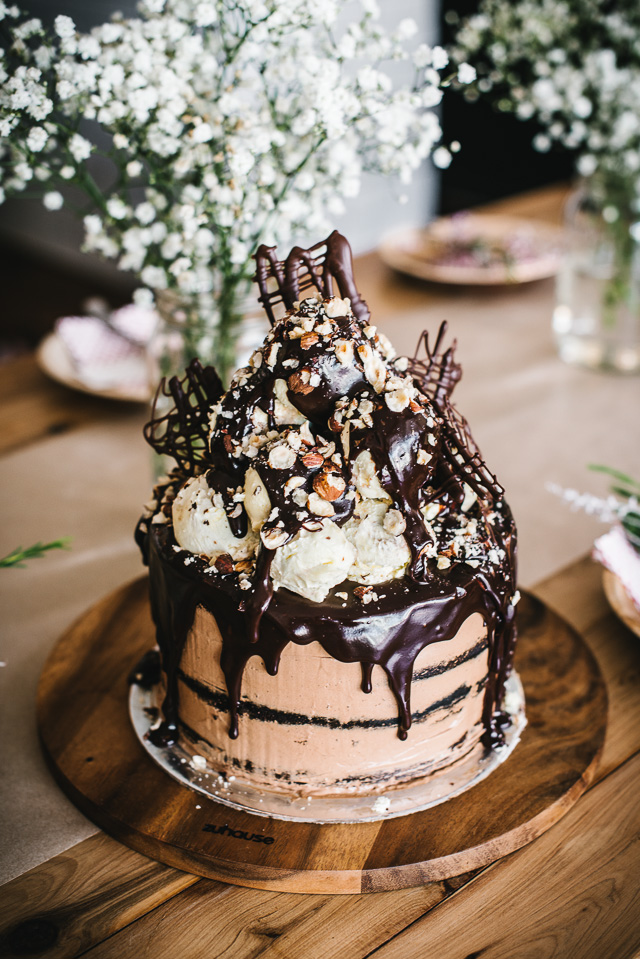
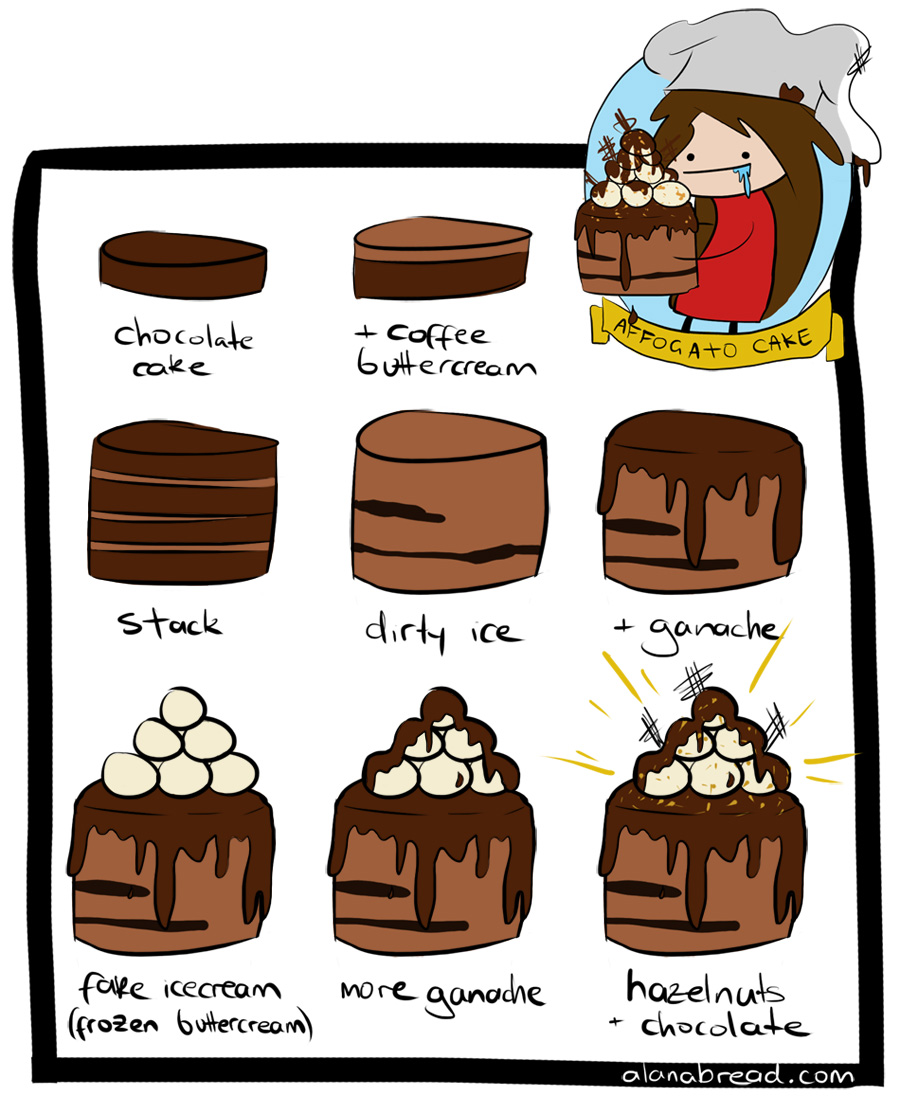
Whatever the case, it was a pleasure and a privilege to bake a big cake for The Makers Society Great Bake Swap at The Hop and Grain last weekend. Assembly instructions are below in terrible animated glory, but as for the “recipe”: I used Tartine’s devil food cake recipe to bake two cakes sliced in half; the icing is Linda Lomelino’s chocolate fudge frosting with the addition of some dissolved instant coffee (replace some of the milk and add to taste) and the drippy chocolate is nothing but ganache (dark chocolate and cream) with a couple of tablespoons of glucose / corn syrup. For the fake ice cream, throw some buttercream in a bowl, freeze it, scoop out some rounds with an ice cream scoop then re-freeze them for easy stacking. I was lazy and used compound chocolate for garnishing, except the Sydney sun was merciless that day and annihilated my rustic spokes. I forgot to take some photos at home before the event (unless instagram counts) so thank you ladies for being so patient with me as I spent too long trying to take a decent photo and thank you for sharing my aff-row-jahhh-teee cake.

Affogato CakeAffogato CakeAffogato CakeAffogato CakeAffogato CakeAffogato CakeAffogato CakeAffogato CakeAffogato CakeAffogato CakeAffogato CakeAffogato CakeAffogato CakeAffogato Cake

Affogato Cake

Tags: , , , , ,

An inherently bad thing about the posting of #clientwork on this #sydneyfoodblog is that I have no means to ride in on my humble-high-horse spraying snarky and/or self-loathing anecdotes, lest I seem unprofessional. “This minestrone soup was inspired by a voyage of self discovery”, or, “be sure to add a pinch of cinnamon to this ice cream recipe; a little hint of spice alludes to all of my sadness, oh my.”

Instead, all I can offer is my repetitive notion of progress, and all that. A few months ago I was asked to take some photos for The Rocks as part of their new branding surrounding Aroma Festival (a celebration of everything coffee and chocolate) and a few other events. A select few ended up on a billboard and flying on flags across Sydney’s CBD, an obnoxious yet temporary reminder that hard work always, always pays off. Looks like all of those coffee pour photos were good for something. Living the IRL life is the IRL dream.

Anyway, started form the bloggosphere now we here. Art direction by Ed Hall at Interbrand – I’m very grateful to be part of this amazing project.

Aroma FestivalAroma FestivalAroma FestivalAroma FestivalAroma FestivalAroma FestivalAroma FestivalAroma FestivalAroma FestivalAroma FestivalAroma FestivalAroma FestivalAroma FestivalAroma FestivalAroma FestivalAroma FestivalAroma FestivalAroma FestivalAroma FestivalAroma FestivalAroma FestivalAroma FestivalAroma FestivalAroma FestivalAroma FestivalAroma Festival

Tags: , , , , , ,

Hot Chocolate

Tonight I read a horrible blog review of one of my favourite restaurants, so, I began to feel incredibly saddened on their behalf and made myself a warm beverage as a result of that #firstworld online stress. And now I’m blogging about that thing I made as a result of blog apprehension. Circle of online life. Be annoyed by internet therefore post on internet.

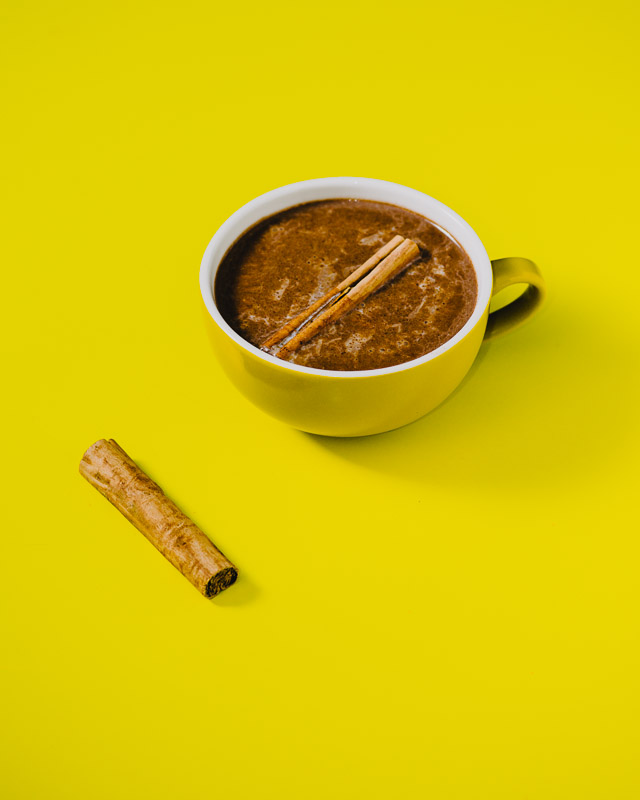
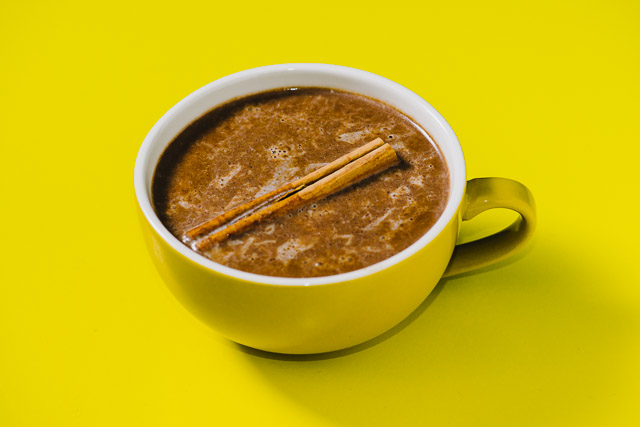
I’m making a stand in not referring to this as “Spicy Coconut Hot Chocolate” up there in that title box because I care not for buzzwords or SEO. Gosh, I’m so kooky and anti-blog! My recipes are so understated and cool! Plus, I have no clever anecdote today except that I reacted in a most delicious way to something that really had no bearing on my everyday life at all. Hahah, feelings. This is spicy and salty and fatty and chocolately so indulge happily, and if you happen to be in a foul mood contemplating why you can’t help but be annoyed by annoying things in the peripherals of your career like I was, relish in its lingering chilli glory and feel it all around.

Hot ChocolateHot Chocolate


Hot Chocolate

1 cup milk
1/2 cup coconut milk
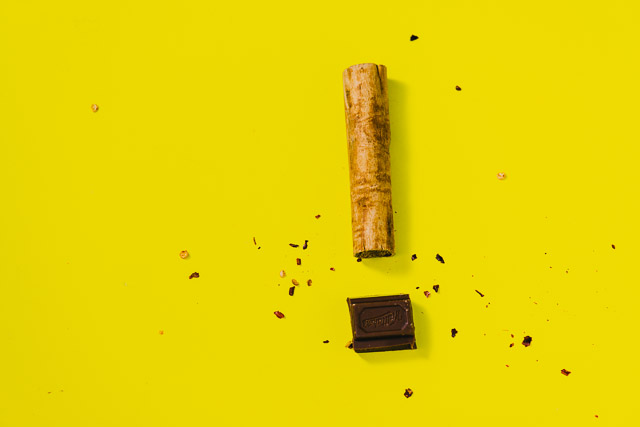
2 cinnamon quills
A few squares of chocolate
1/2 tsp dried chilli
Pinch of salt

1. Warm milk and coconut milk in a saucepan. Add one cinnamon quill and bring to the boil. Once hot enough, simmer until the milk is infused with cinnamon (around 15 minutes). Remove from heat, add chocolate and stir until dissolved (you may need to apply more heat to finish the job). Add chilli and salt, stir to combine and pour into mugs. Float another cinnamon quill on top and down that bad thing like you just don’t care.

Tags: , , ,

S'mores Cake

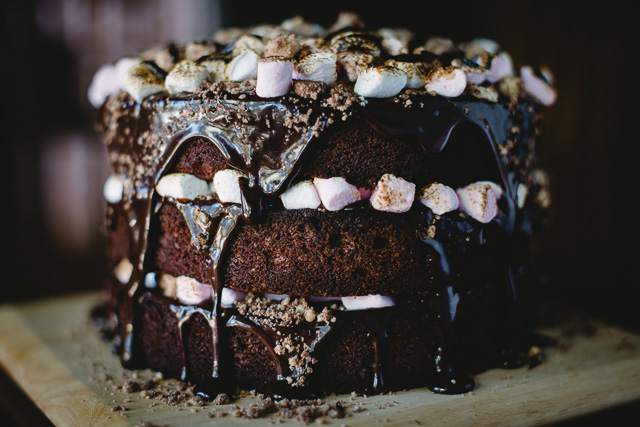
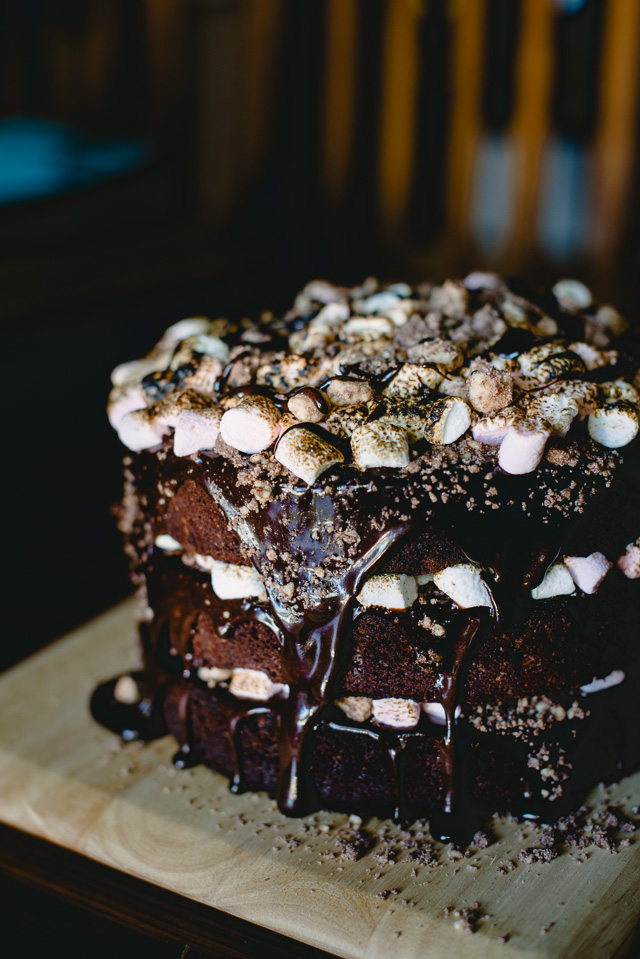
I do not have a clever anecdote, relevant life story or poignant statement in relation to this cake, instead I can offer a few simple home truths. It was my friend Felicia’s birthday yesterday, she’s a pastry chef and therefore deserved a spectacle more thoughtful and curious than the usual birthday fare; rich chocolate cake, malty and salty ganache, crunchy crumbs and chewy, charred marshmallow. Sound legit? Well. This cake ended up so intense it made the aperture blades in my brand new lens seize up (no joke, I’m now spending my day off tomorrow visiting the camera service centre). This s’mores cake literally forced my camera into a food coma just by looking at it.

The directions, dare I say gospel, according to Momofuku’s class act via Bonappetit were followed to a tee however their signature naked-cake style was abandoned in lieu of my penchant for a good chocolate drip cake. It was kept messy all ’round since successfully hiding behind the guise of rustic when in actual fact I lack kitchen finesse is my greatest aesthetic flaw trait. If you enjoy your sweet treats tall and gooey this might just be the cake for you, a Momofuku recipe with a heavy-handed twist.

S'mores Cake
S'mores Cake
S'mores Cake
S'mores Cake


S’mores Cake (by Momofuku / Christina Tosi via Bon Appetit)
Milk Crumbs
3/4 cup milk powder
1/2 cup flour
3 tablespoons sugar
2 tablespoons corn flour
3/4 teaspoon sea salt flakes
80g butter, melted
12 tablespoons Ovaltine mix
80g white chocolate, melted

Malt-fudge sauce
1 1/3 cups Ovaltine mix
120g dark chocolate (I used Lindt 70%)
1 teaspoon molasses
Pinch of sea salt flakes
1/2 cup cream
1/2 cup glucose / corn syrup
1/4 cup sugar

Chocolate cake
60g dark chocolate
1 3/4 cups flour
3/4 cup dutch-process cocoa
2 teaspoons baking powder
1 teaspoon sea salt flakes
170g butter, room temperature
2 1/4 cups sugar
3 tablespoons glucose / corn syrup
3 eggs
3/4 cup buttermilk
1/3 cup vegetable oil
1 teaspoon vanilla extract

Malt soak
1/2 cup milk
3 tablespoons Ovaltine mix

Assembly
2x packets mini marshmallows (sorry didn’t make note of the grams!)
Brûlée torch

Milk crumbs
1. Preheat oven to 130°C. Combine milk powder, flour, sugar, corn flour and salt in medium bowl; toss to mix evenly. Add melted butter and stir with fork until clusters form. Spread mixture evenly onto baking tray lined with parchment paper. Bake until crumbs are dry and crumbly but still pale, about 10-15 minutes. Once cool toss in a bowl with Ovaltine mix and white chocolate. Toss until completely coated and allow to dry.

Malt-fudge sauce
1. Place Ovaltine, chocolate, molasses and salt in a bowl and set aside. Combine cream, corn syrup, and sugar in bowl and microwave until everything has dissolved. Pour cream mixture over chocolate mixture and let stand for 1 minute, then stir until smooth. Whisk until sauce is glossy. Set aside.

Chocolate cake
1. Preheat oven to 180°C. Coat three 8-inch cake pans with nonstick spray. Line bottom of each pan with parchment round and coat parchment with nonstick spray. Place chocolate in small bowl and microwave in 15-second intervals just until melted, stirring occasionally. Set aside.
2. Sift flour, cocoa powder, baking powder and salt into medium bowl. Combine butter, sugar, and glucose in large bowl and beat on medium-high speed until fluffy and pale, about 2 minutes. Scrape down sides of bowl and add eggs. Beat to incorporate then increase speed to medium-high and beat until mixture is fluffy, about 2 minutes. Scrape down sides of bowl. Add melted chocolate and beat briefly until blended. Add buttermilk, oil, and vanilla and beat until pale brown, about 2 minutes. Add dry ingredients and beat on low speed just until blended. Divide batter among pans.
3. Bake cakes until tester inserted into center comes out clean, about 20-30 minutes. Cool completely in pans on racks.

Malt soak
1. Stir milk and Ovaltine in small bowl.

To assemble
1. Rewarm sauce until just pourable. Spoon a couple of tablespoons of it in the centre of your cake board and place the first chocolate cake round on top (this is to ensure it stays put). Brush over a few tablespoons of the malt soak, cover with some chocolate sauce, just under a third of it (allowing some to ooze over the edge if you feel so inclined), add a third of the malt crumbs and a quarter of the mini marshmallows. Torch the layer of marshmallows lightly for that charred, s’morsey feel. Add a little drizzle of chocolate sauce and add the second cake round. Repeat adding malt soak, chocolate sauce, crumbs marshmallows, torching and more sauce. Add the third cake round. This time top the cake with more sauce then the remainder of the marshmallows. Torch those bad boys then sprinkle with the remainder of the milk crumbs and drizzle the rest of the chocolate sauce on top (a word of advice: if it begins to do the leaning tower of Pisa thing, don’t sweat it; it’s rustic and beautiful). Add birthday candles and you’re all set.

Tags: , , , , ,

… aka Condensed Milk Madness aka Get Me Outta This Confectionary Nightmare aka WHIMSICAL SALVAGE MISSION 101.

Around a week ago I posted this image. You know, Homer’s struggling to make breakfast for Mr Burns and even his cereal catches alight. I believe this series of stills captures my experience from the get go. With our internet personnas often providing a snapshot of only the excellent successes in our lives it’s a good, nice and healthy thing to occasionally acknowledge some undeniable frustrations.

The Sweet Swap is an exploration of generosty and sharing with all registration costs heading straight to Child Fund Australia so to complain too much of my myriad of kitchen fails may be considered in bad taste, however, in times like these all you can do is laugh so here’s the CONDENSED (ha ha ha ha ha) version of my trials and tribulations. For those who don’t know each participant of The Sweet Swap is assigned three random bloggers to post a box of homemade-with-love treats to and, in return, three entirely random sweet care packages will arrive in the mail from three new friends. Community spirit, man.

Embracing notions of ~seasonal produce~ I made some quince caramels on a whim, possibly the best thing I’d ever tasted but I used a little too much butter and I grew concerned for their mail-worthy safety and thus were ditched (into my mouth hole). I then went out and, for my gluten intolerant friend, bought a buttload of fancy flours to bake some cookies; unfortunately twitter alerted me that baked treats were not allowed. So I then attempted to prepare two kinds of jelly (raspberry + elderflower) to create something like the Zumbo fried egg in his book. From pâte de fruit to bombing the mixture with gelatine… it wasn’t happening (evidence of ensuing insanity lies here). So, I swallowed my pride, my awful and entitled my pride, I conquered my biggest fear and turned to… to… Donna Hay for a simple recipe for fudge. One was to be a spicy chocolate the other a boozy white but despite using coverture white chocolate the entire mixture of my first batch errupted into an oily, buttery mess. The heck? I tweaked the recipe and was left with only chocolate fudge. Dulce de leche was prepared as an accompaniment as I’ve made it dozens of times, and, lo and behold, for the first time ever some water escaped into the bain marie making the final product lumpy and imperfect. OH MAN. But at least I got there in the end, albeit modestly.

Lesson learnt: if you haven’t the time to be entirely focused just don’t do thing because confectionary is a harsh mistress and she will make you suffer a disappointing sugar-laden kitchen death when your priorities currently and unfortunately lie elsewhere. But enough with the whinging! Admittedly I was so mad during the cooking (failing) process I barely took any photos so here are some snaps as I was packaging my extraordinary comedy-of-errors. Before that though, and more importantly, I should share my trio of tempered chocolate perfection I very graciously received; panna cotta lamingtons by Simon of The Heart of Food, home made Snickers by Phuoc of Phuoc’n Delicious and Mallow Rough from Chocolate Johnny. No words, guys. Way to make me feel like an epic kitchen amateur in mere mouthfuls. THANK YOU. #blessed

Now for my dinky treats en route to my three recipients Christine of Cooking Crusade, Gareth of Humble Crumble and Martine of Chomp Chomp. I attempted to save them the only way I knew how; cute jars, twine and a post office delivery on my twee-beyond-words bicycle (please forgive me for I have sinned). I’ve linked back to the original recipes but Donna Hay’s fudge recipe may have some butter issues so… maybe go with my directions instead. Furthermore the spices are just an indication as I didn’t measure very well, taste test as everything is melting ok! Here’s how to get kooky with a few tins of humble liquid gold.


Winter Chocolate Fudge
(original recipe by Donna Hay)
400g chocolate, chopped
1x can sweetened condensed milk
150g butter
2 tbs ground mustard seed
1 tbs chili flakes (+ extra for decoration)
2 tsp salt

1. Place the chocolate, condensed milk and spices in a saucepan over low heat and stir until the chocolate is melted. Add the butter and stir again until everything has completely melted. Taste test and add more spices accordingly. Keep on the heat for a couple more minutes then carefully pour the mixture into a lightly greased 16cm-square tin lined with non-stick baking paper. Smooth over with a palette knife, sprinkle with chili flakes and a little salt and refrigerate for 2 hours or until set. Remove fudge and cut into small squares and wrap each piece in non-stick baking paper.

Dulce de Leche
(original recipe by The Food Dept.)
2x cans condensed milk
A few pinches of salt (I used a combination of orange + fennel infused and the regular kind).

1. Preheat oven to 200°C. Pour sweetened condensed milk into a baking dish with salt and stir to combine.
2. Cover the baking dish tightly with foil and place into a larger baking dish to create a bain marie. Once the oven is ready place the dish in the oven and fill with warm water until almost full.
3. Bake for 1 3/4 hours or until the condensed milk is golden/brown in colour. You’ll need to top up the water in the bain marie every as it evaporates.
4. Remove from oven, (carefully) remove foil and whisk until the dulce de leche is smooth as heck and ready to devour. Store in airtight jars. Adorn with a little extra salt.

Thanks very much to Sara and Amanda for organising the entire project, mammoth effort ladies! I’m looking forward to clearing my schedule in preparation for next year to avoid further disasterchef moments.

Tags: , , , ,

As bloggers we are content creators, we make neat stuff whether it be photos, drawings or pieces of insightful writing to entertain and/or educate the internet masses. If we have a corner of the internet we have a responsibility to represent ourselves in entirety; creatively, emotionally, whatever. We push the boundaries of what we know and enjoy and create new and exciting things to share. In turn we are inspired by what others do. An honest blog is a beautiful outlet of nice sentiments and hard work. Personally, my benchmark of a good post is one that disregards all the trends and basks in the sweet glow of straight up originality (if there even is such a thing).

However.

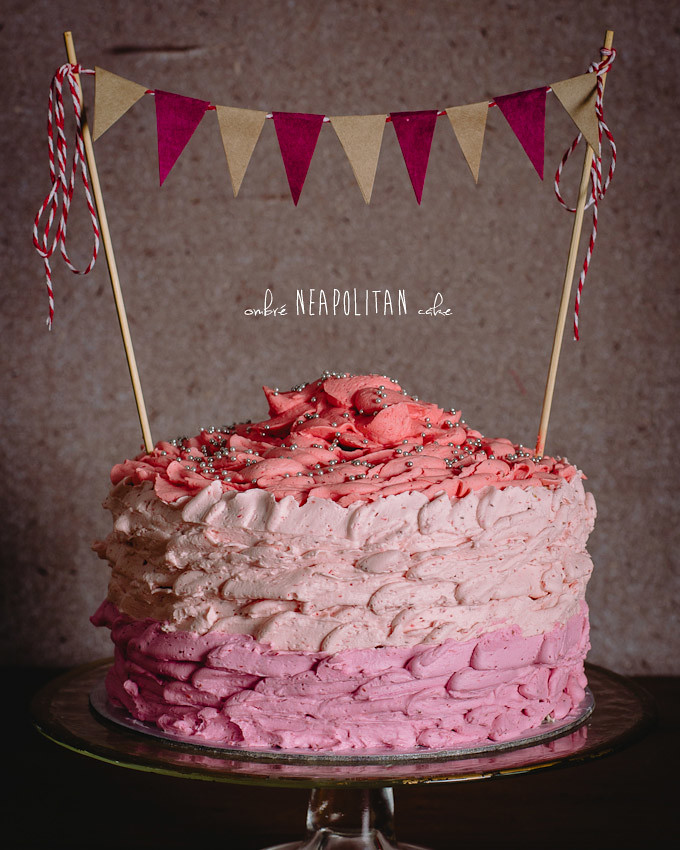
This weekend something took hold of me. A terrible monster. Like the devil’s grip I was thrown into the shallow abyss of kawaii cake trends. On Friday night I was up at 2am gluing small triangles onto striped twine and you know what? I felt so alive… like I was patting a pack of pugs whilst simultaneously poaching an egg for brunch. I made ombré cakes, I stacked them high and got rustic with a Wilton #125 tip. Pink. Chocolate. Strawberries. Ruffles (kinda). Bunting. Is this how God feels (on one of his more leisurely days)? Can I put a bird on it? These are my dirty kicks. I was possessed by a beautiful twee monster all in the name of creating a nice birthday cake for my friend Julie. HAPPY BIRTHDAY JULIE!

Basically what I’m trying to say is sometimes I cannot resist the warm, comforting yet disgusting lure of a good dessert trend. Ombré + bunting. It’s Etsy crack, it’s twee porn. But it’s ok (sometimes), or at least that’s what I’m trying to convince myself. I did not choose the Etsy life, the Etsy life chose me.

I named this a “Neapolitan Cake” mostly for the wank, however, upon actually tasting the combination of vanilla cake, chocolate ganache/buttercream, strawberry swiss meringue buttercream and slices of fresh strawberries together the cake really did emulate flavours of a straight up ghetto tub of Neapolitan ice cream. So good. One of my favourite cakes to date. In fact, pastry chef Felicia said it best when she confided “I know exactly what’s in this icing yet I can’t stop eating it”.

Because I so often keep it real I don’t have any staged “slicing of the cake” photos, instead I have some unglamorous shots as it was divided between the 12 of us at a restaurant in Glebe. In true (new?) alanabread style I’ve illustrated how to construct this tower of twee (no recipe this time but send me an email if you’d like some assistance on that front). Otherwise just stack it, dirty ice it then slater it (maybe stab it with bunting if you’re ready to embrace twee).

Also (not even an attempt at a suave segue here), I was recently informed alanabread was not only nominated but is a finalist in the Voices of 2013 blog awards! So thank you so, so very much to everyone who nominated me and of course to the judges, I really appreciate the recognition. Congratulations to all my blogging peers also, you can find the list of finalists here. But, I digress (sneaky tear), here are some cake related pixels. Good luck and enjoy!

Tags: , , , , , , ,

So I made some chocolate brownies (how original!). But first! Some housekeeping.

SBS Food were recently kind enough to interview me as part of their Featured Foodie series. I once considered these badges some ~top tier stuff~ before meekly venturing into the foodblogging world so it feels surreal baring one of my own. Have a read of my interview whereby I discuss things that are both awesome and terrifying (I am a closet neurotic). Thank you, SBS!

Secondly! I’ll be in Melbourne for a couple of days for the Vignetting Victoria exhibition. If you’re free and in town please come down, it’s at Federation Square plus I’m fairly certain there will be free booze on opening night (after all, that’s the real reason we attend exhibition openings). My holga camera first pushed me into enjoying photography years ago so I’m really excited to be part of this. The image used in the poster is actually one of mine which is another very nice thing.

And now, finally, let’s talk brownie. After a near melt down over twitter the other day I was barely able to post these photos. Brownies are just so… ordinary. And, similarly to my cheesecake rant they are something I never, ever order for fear of disgusting, dry crumbs and unsavoury nuts all over my plate. No thanks! Needless to say I made up this recipe recently as a reaction against all that is gross about gross brownies because I am so postmodern and have far too much time on my hands and also wanted chocolate. This is exactly the sort of thing I imagine people downing an entire tray of whilst crying to themselves on the couch. That’s my measure of a damn good dessert. Cry-eating.

I made these again the other day for a weekend picnic, cut them up into miniature bites and staged them in a vintage-esque cup and saucer amongst some yellow fabric I had left over from a recent photo shoot. I then did that thing where I doubted myself, had a brain vommy whilst reviewing said photos and did a little cry-eating but I’m ok now. I’m ok because my friends said these were delicious and, dare I say, “moist”? No. Let’s just stick with chewy and delicious. I tried making them with a little dulce de leche swirl but the flavour seemed to dissolve in the baking process; I’m not coining the term “brownies with dulce de leche swirl”, at least not yet, because it wouldn’t be fair to post a recipe that doesn’t deliver as per its glorious header. CLOSEUP!

Aw yeah. It’s one bowl. There’s some salt, cinnamon and coffee to give it all a little more somethin’-somethin’. No nuts, all chocolate. I know every single food blog in the universe has a brownie recipe but I’d like to think mine fares pretty well so next time you need a chocolate hug give these a try.

Chocolate Brownies
80g milk chocolate
100g dark chocolate (I used 85%)
80g butter
3/4 cup sugar
2 eggs
1/3 cup flour
3/4 tsp salt
1/2 tsp cinnamon
1 tbs dried coffee
3 tbs hot water

1. Preheat oven to 180°C.
2. Gently melt chocolate with butter. Add sugar and stir to combine. Add eggs one at a time and stir vigurously until once again combined. Add the flour, salt and cinnamon and combine once more. Add the dried coffee to hot water until dissolved then add to the brownie mixture and stir once more.
3. Pour mixture into a square tin lined with parchment paper and bake for 30 minutes. Remove and allow to rest for 10 minutes before slicing.

See you on Tuesday if you can make it to opening night! Come say hello! Otherwise… #cryeating!

Tags: , ,

I FEEL COMPELLED TO TYPE IN CAPITAL LETTERS FOR A SENTENCE OR SO BECAUSE I AM A BIT ANNOYED. I NEVER INTENDED FOR IT TO BE THIS WAY BUT UNFORTUNATELY MY EMOTIONS HAVE GOTTEN THE BETTER OF ME AND HERE I AM SHOUTING IN THE GENERAL DIRECTION OF THE INTERNET, MY PRECIOUS OUTLET. AHHHH! BOOO HISSS VENT VENT VENT ETC ETC

My camera is broken. Well, was broken (the nice people at Nikon HQ have since worked their repair magic). It began seriously playing up at the most inconvenient of times; in the middle of a photo shoot! Now, “photo shoot” is a term I avoid using at the best of times because it conjures weird and strange memories of dudes with enormous egos (it’s a long story and I am a complicated girl), however, the location was somewhere other than my bedroom for once, with a model, an assistant and a whole lot of pretty props so I’m allowing myself just this once to indulge in some jargon. The reason I had finally ventured away from my “bedroom studio” and was standing amongst all of these seemingly professional and nice things is because I was encouraged to enter the San Pellegrino Café Society photo competition by a tutor at uni to broaden my photographic horizons. As I may have mentioned before I’m making a big effort to work on photography, building up a portfolio and all that, to avoid the dreaded jack-of-all-trades-master-of-none syndrome that seems so easy to slip into these days like an unfortunate coma of artistic mediocrity. “So, what do you do for a living?” “Oh, I’m a creative“. No, no, no, no; that certainly isn’t the life for me.

Café Shenkin in Erskineville was my allocated venue, a wonderful space dripping with rustic charm (~my dream~) with the gorgeous Chloe and assistant Felicia. I’d sourced some old books, acquired many coffee beans, picked some flowers, spent all of my play money on raspberries and baked a big ol’ chocolate cake for my table setting. Everything was going fine until my camera refused to focus and chromatic aberration (those annoying blue/purple lines that fringe objects in photos) was all over the place. Every single photo looked a little skewed and I could not work out why, I’d put it down to using a wide lens as I was snapping. It wasn’t until browsing my set on Lightroom however the intensity of the matter loomed over my foolish optimism (I then spent the next few minutes hulk-smashing everything in sight as it was clear something had gone spectacularly wrong). According to the repair report there was an alignment issue within the camera body, hence the amazing lack of clarity. Luckily the photos are salvagable!… but could have been so much better. At the same time the situation could have been so much worse. LIFE, OH LIFE, OHHHHH LIIIIFE (dooo do do doooo).

So! The photos you’re seeing are from a seriously busted (two month old!) camera. So much lost detail (sigh). Here are some portrait photos, tell me what you think (I went with the last one but just quietly the second-last will always and forever be my favourite)!

I didn’t exactly to think to take a thought out photo of the cake and only ended up snapping some at the last minute before dividing it up between the troops to enjoy for later. I actually (mostly) followed a recipe for this one since it needed to be photo-worthy and required an icing to withstand some car travel. No winging it this time! This recipe isn’t a life changer but it’s simple, easy and comforting; a nice blank canvas for any decoration or accompaniment. PRO TIP: Cut yourself a slice and microwave that badboy for 30 seconds. The icing will melt all around dat cake creating the most delicious faux-self-saucing pudding of all time.

Simple Chocolate Cake with Raspberries
(an adaptation from Anneka Manning’s Mastering the Art of Baking)

Cake batter
185g butter, room temperature
330g (1 1/2 cups) caster sugar
1 tsp vanilla extract
3 eggs, room temperature
260g (1 3/4 cups) self-raising flour
55g good quality cocoa powder
120ml milk
60ml espresso
1 tsp salt

Icing
120g dark chocolate, chopped
40g butter, chopped
165g (1 1/3 cup) icing sugar
3 tbs milk
Pinch of salt

To serve
Fresh raspberries
Icing sugar, for dusting

For the cake
1. Preheat oven to 180. Grease/line a 9″/22cm cake tin.
2. Beat the butter until creamed and beginning to pale. Add the sugar and vailla and continue to beat until combined. Add eggs, one at a time, until completely incorproated into the batter.
3. Sift flour and cocoa in another bowl with the salt and gently fold into the batter mixture, alternating with the milk and espresso.
4. Pour into cake tin and bake for around an hour. Allow to stand for 10 minutes before transferring to a wire rack to cool completely.

For the icing
1. Heat chocolate and butter slowly over simmering water, stirring continuously. Once melted and smooth slowly add sifted icing sugar and milk and continue to stir until smooth. Allow to cool to a spreadable consistency, if needed.

To serve
1. Ice cake, beginning at the top and moving down towards the sides. Adorn generously with fresh raspberries and a little icing sugar just before serving.

RIP the delightful pixels that could have been.

Tags: , , , ,

Mango Cheesecake with Chocolate + GingerCan we talk about cheesecake for a moment? Cool. Please take a seat and make yourself comfortable, this may take a while.

Let’s talk dense, dry cheesecakes. Lingering in our cafés. Lurking beneath cake box lids. Taunting us with a seemingly inviting berry glaze until we discover that chalky mess upon our first bite. Such a shame. A dairy-riddled tragedy. Ordering cheesecake when I’m eating out is a risk I’m just not willing to take these days, it’s an extreme sport of the yuppie variety.

This cake was actually inspired by that girl who cries all the time on MasterChef. She made a messy, lemon cheesecake last week and although I try to sympathise with the pressures of cooking with a plethora of cameras in your face I couldn’t help but feel a little taken back. As soon as the episode finished I promptly began working on this silky wonder to right the wrongs of that young beanie-head. I’m a cheesecake snob, a real jerk I’ll admit, so if I’m into this recipe then I’m sure you’ll be too!

Mango Cheesecake with Chocolate + Ginger

While I’m at it let’s get a dialogue happening regarding ginger because it’s so disappointing when awesome spices have such exhausted connotations. In my day-to-day life ground ginger only makes a brief appearance in hot cross buns at Easter, when not being overpowered by it’s far more popular cousin cinnamon, and on occasion gingerbread makes a vague appearance down here in sunny Australia. Like salt to chocolate, ginger to mango is really special. It makes me all warm and fuzzy.

The base of this cheesecake is wonderfully spiced and the cheese filling bakes to the texture of a firm custard. Add a little more chocolate on top, and… ahh. Hello, lover. I’ve used a combination of biscuits readily available in Australian supermarkets but of course you can use whatever you please so long as they’re crunchy. If you’re reading this out-of-peak mango season then using the tinned stuff is fine as well, the flavour will be a little more subutle.

Mango Cheesecake with Chocolate + Ginger

On another related note, I’ve been spending my free time (or what little of it I have left these days) interning at a really cool magazine here in Sydney taking snaps in cafés and learning heaps along the way from some incredibly talented people. For these shots I mustered everything I had learnt over the week and tried to apply them here; natural lighting, tripod skills and remaining calm. I threw open my blinds and took many deep breaths. Coincidentally they required the least amount of editing of any set of photos I’ve taken. I’m fairly pleased with the results but as always do tell me what you think! This will serve 10-12 people.

Mango Cheesecake with Chocolate + Ginger
(an original recipe)

125g ginger nut biscuits
125g chocolate ripple biscuits
70g butter, melted
1 1/2 tsp ground ginger
Flesh of 1 large mango (around 200g)
250g cream cheese
250g mascarpone
100g sour cream
120g caster sugar
40g brown sugar
2 eggs
1 egg yolk
100g dark chocolate, roughly chopped
40g cream
1 tsp glucose / corn syrup
Cocoa, for serving

1. Preheat oven to 150°C and grease/line a 9 or 10 inch spring form pan.
2. Prepare biscuits in a food processor until ground. Add 1 tsp of ground ginger and stir in melted butter. Press into base of springform pan until flat and firm. Chill in refrigterator.
3. Prepare mango flesh in food processor until beginning to puree. Add cream cheese, mascarpone, sour cream, caster sugar and brown sugar and process until combined. Add the eggs and egg yolk and once again process until combined. Remove base from fridge and pour filling into springform pan. Bake in oven for 1 1/2 hours. The edges should be fairly firm with a bit of wobble towards the centre. Remove cheesecake from pan once cooled and place in the fridge to chill completely.
4. In a small saucepan (or microwave) warm cream until almost boiling. Pour over the chopped chocolate in a heat-proof bowl and stir until mostly melted and combined. Add 1/2 tsp of ground ginger and glucose and again stir to combine. Remove cheesecake from fridge and place on serving platter. Drizzle chocolate sauce over the top, Pollock style. Sprinkle a little cocoa and serve.

NOTE: You can also bake these as cupcakes if you like, I’d suggest baking them for around 25 minutes.

Mango Cheesecake with Chocolate + Ginger

Let’s dedicate this post to all the lost causes out there. Bad cheesecakes, my heart weeps for you. My heart weeps for this too but in a different way. It’s so naughty yet I feel no remorse. None, whatsoever.


Tags: , , , ,

« Older entries