cheese

You are currently browsing articles tagged cheese.

Rosemary poached apricot and wine poached pear crostini

Imagine telling our famished ancestors that some people these days create plates of food just to improve their SEO. “Oh, this isn’t a plate, it’s an enamelware prop“. “Can I eat yet?”, “no! I need to take a photo!”

I’m not one for profound reflection but if 2013 has taught me anything it’s that of the fine art (and dark art) of the facade.

I write in my about section that the “true value of food as a homely and generous act” is perhaps being lost amongst 1) the desire to articulate every single thing we cook, and 2) the need to document every single thing we eat. Articulation takes time whereas hot food on a plate has a considerably short shelf life as we collect our thoughts and adjust the settings in our cameras.

We’re shrouded in duplicate information of the hottest new Sydney spots and are bombarded with images of staged food. Occasionally people who make food at home for themselves/friends/family choose not to live in the delicious moment and instead place a board behind their dinner, delicately locate a fork at a whimsical angle and take a photo. Sometimes if the food goes cold it goes into the bin.

I’ve been guilty of this myself, though less so than I used to, so I understand, but I find the whole “recipe blogging” process irritating if it becomes a wasteful act.

Cutlery shopping is now “prop sourcing”, whipping up something new is now “recipe developing” and I feel the whole scene is becoming too self important with a disregard of spontaneity and generosity which, with food, is really important.

So my faux-revalation for the coming year is; keep it real and drop the act and facade of stylised food. Once in a while ditch the props, don’t worry if your photo isn’t perfect and relish in the now of documenting how things look rather than how you’d like them to look as you’re sharing them. Don’t listen to what you’ve heard, using flash can be awesome (Vice, are you listening?? I’m cool. Somebody’s even throwing up their rude finger in one of these photos). By all means go snap happy, just don’t berate your friends for eating a dish you generously prepared for them because you need to style it with a different spoon. Hands look better in food photos anyway and honest images speak volumes alongside the constantly artificial and staged.

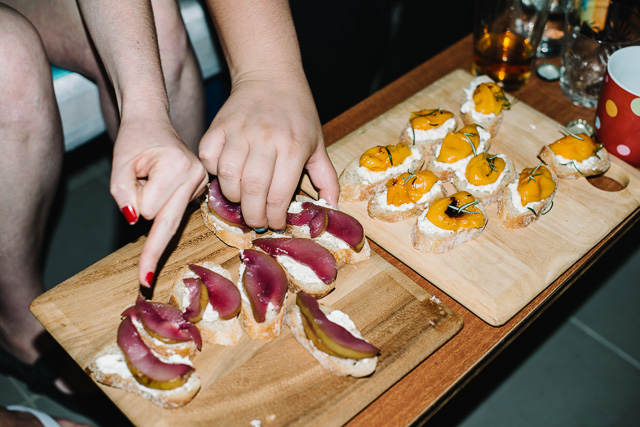
SO! Here are some crostini I prepared for NYE (sans toasting, no time and too much effort); wine poached pears with a holy trinity of cheese and rosemary poached apricots with ricotta. They’re not heaps beautiful of typically photoworthy but that’s ok! My friends enjoyed them and that’s all that matters. Someone even shouted “ALANA ARE YOU BLOGGING?!” from the balcony as some flash spilled from the kitchen, and that’s ok too, because I was only “blogging” for a few seconds. Happy 2014.






For the poached rosemary apricots
Collect some generous sprigs of rosemary for your backyard (or local store). Dissolve a cup of sugar in four cups of water in a pan over a stove and allow the rosemary to infuse. Meanwhile halve the apricots and remove the pips. Simmer in the rosemary syrup for around 5 minutes and transfer to a baking dish with a slotted spoon. Sprinkle with some caster sugar and place under a hot grill until tops are burnished. Meanwhile, reduce the poaching liquid and you’ll have a nice rosemary syrup to use for drinks and other things. Assemble by spreading ricotta on some sliced baguette, then an apricot half, then some fresh rosemary leaves.

For the wine poached pears and cheese
Dissolve three quarters of a cup of sugar in some nasty red wine you have floating around the house in a saucepan and add three sliced pears to simmer. Once tender (15ish minutes), remove with a slotted spoon and allow to cool. Combine 150g of cream cheese, 200g of feta and 80g of stinky stilton into a holy trinity cheesy spread (these are approximate measurements, add to taste). Assemble by spreading stinky goodness on bread then adoring with a couple of pieces of sliced pear.

Tags: , , , , ,

…aka the Three Cheese Delight aka Cheeses of My People Tart aka Baby Don’t Kiss Me. It’s the Ottolenghi recipe so good even Martha Stewart is onto it. C’mon, let’s get quaint with this caramelised garlic tart.

My friend Andrew hosted a potluck birthday party this weekend (HAPPY BIRTHDAY ANDREW!) and this was my contribution. This tart is my first recipe cooked blind (no pastry pun); I’m on a diet due to some near startling health news (nothing serious but from what I recall the doc said my veins were clogged with pure Nutella and I must be cleansed) so I’m keeping to a strict diet for a few weeks/months/who know until I’m better and possibly more attractive-er. With a blindfold wrapped firmly around my tastebuds held together only by fickle willpower I was unable to indulge in the stinky delights of this tart however my friends said it was nice and the minuscule lick I enjoyed over dinner seemed balanced, so, good times? This tart heats up really well too; I prepared it the day before the party and warmed it in the oven at Andrew’s place for around 10 minutes before serving.

The three cheeses of my people element comprises of feta, haloumi and kefalograviera (possibly my fav cheese of all time) to form the cheesey holy trinity of my ethnic background. If you don’t have access to this fabulous array try using one bitey, one mild and one… whatever the heck you like. Or just whack some goats cheese in there, oldschool. Keep it to around 240g and try to include both soft and firm cheeses.

Caramelised Garlic + Three Cheese Tart
(adapted from Ottolenghi)
2 sheets puff pastry
2 large heads of purple garlic, cloves peeled
1 tbsp olive oil
1 tbsp balsamic vinegar
220ml water
1 tbsp caster sugar
1 tsp chopped rosemary
1 tsp chopped thyme, plus a few whole sprigs to finish
100g Bulgarian feta
80g haloumi, grated or roughly chopped
80g kefalograviera or kefalotyri, roughly chopped
2 eggs
200ml cream
Salt and pepper

1. Preheat oven to 180°C. Line a round tart tin with puff pastry and refrigerate for 20 minutes. Once chilled blind bake in the oven for 20 minutes being sure to weigh down the case with pie weights (or in my case some beans). Remove weights and bake for another 10 minutes until begin to golden.
2. Blanch garlic by boiling the cloves for 3 minutes. Strain well, return pan to heat and add olive oil. Once hot add the garlic cloves and fry for a couple of minutes. Add balsamic vinegar and water and simmer for 10 minutes. Add the sugar, rosemary, thyme and a pinch of salt and continue to simmer until the liquid has almost entirely evaporated (around 10 minutes).
3. To assemble the tart sprinkle haloumi at the bottom of the tart case followed by the kefalograviera then crumble the feta on top. Arrange caramelised garlic cloves over the cheese. Whisk the eggs and cream with some salt and pepper and gently pour over the tart. Season with cracked pepper and sprinkle with thyme leaves.
4. Reduce heat to 160°C and return tart to oven for around 45 minutes or until the top is golden and set. Remove from tart tin and serve with a whole sprig of thyme to garnish.

Tags: , , ,

DID YOU KNOW? Ice cream melts. The recommended storage temperature of this frozen treat is around -20° and is best served straight from the freezer. If left at room temperature for more than a few moments it will return to its liquid state. SCIENCE.

I’ve recently been reading The Food Stylist’s Handbook and, amongst the pages of wonderful lies of tall burgers hinged on unseen scaffolding and hidden blow-torches and paint brushes behind closed sets, lies this sentence:

“… fake ice cream is basically just powdered sugar and a solid fat of some sort… some stylists add corn syrup… your [fake] ice cream should have the texture of pastry dough of Play-Doh.”

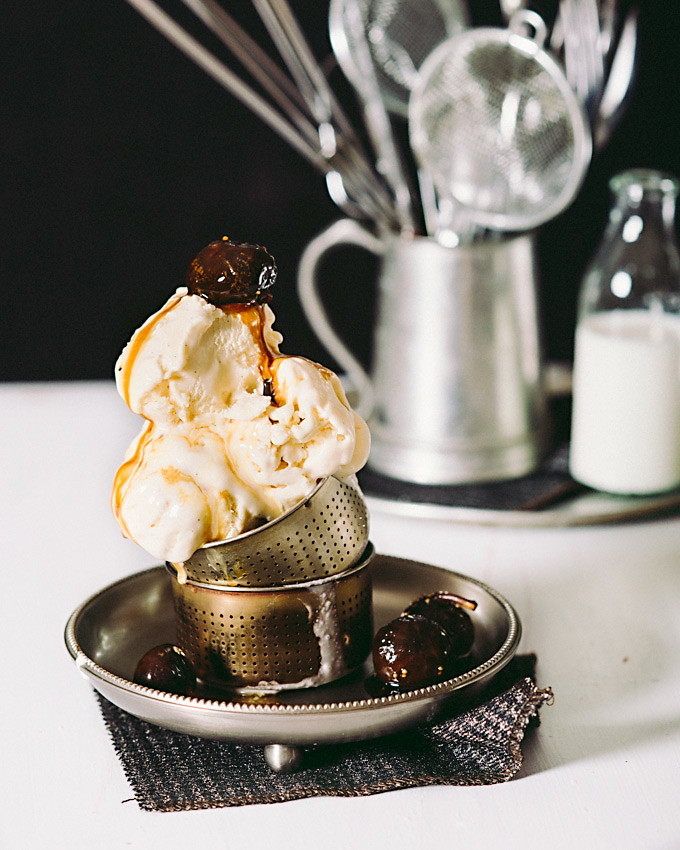
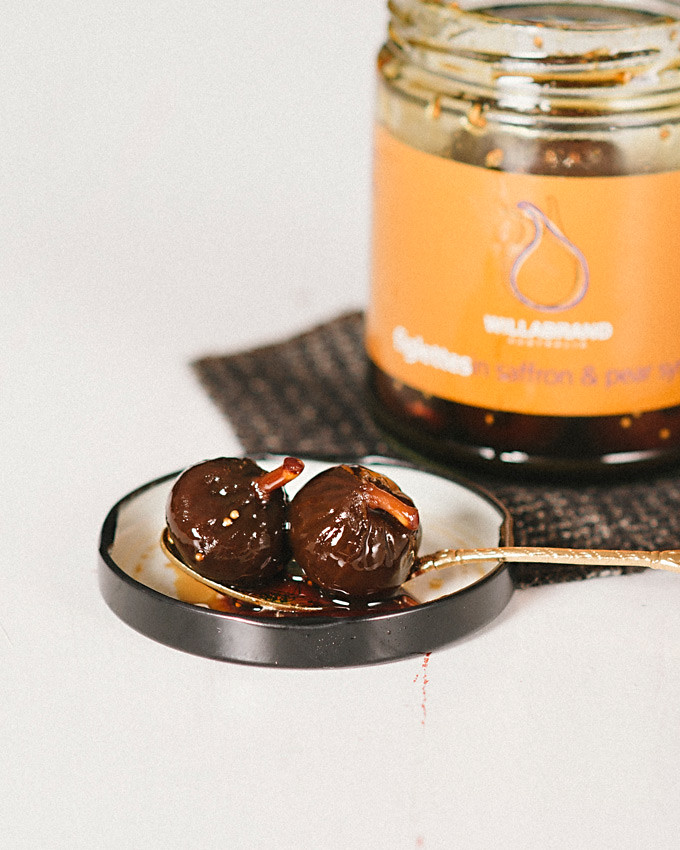
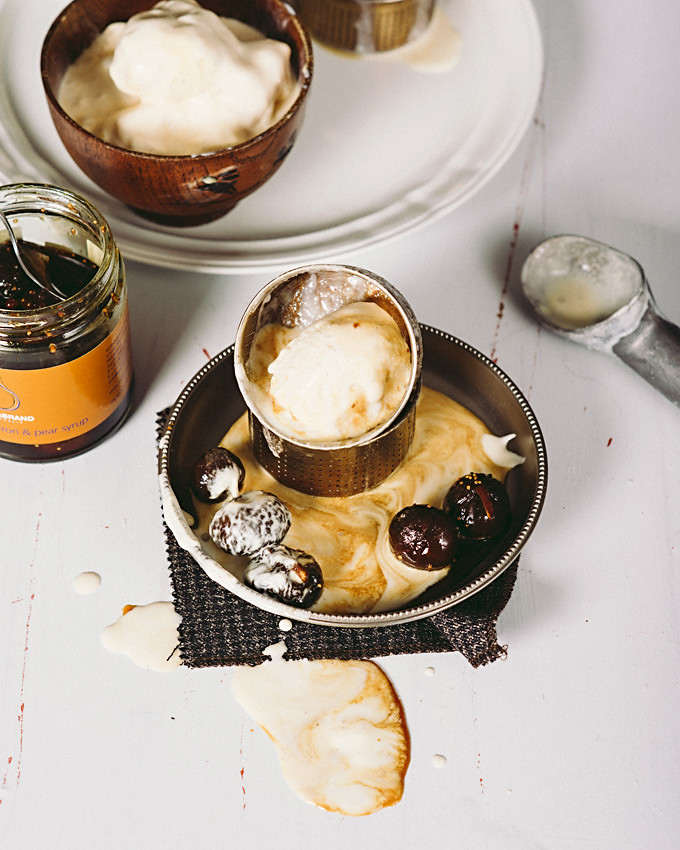
Cream at Sassafras very kindly sent a jar of saffron + pear figlettes to play with, little did I know developing an ice cream recipe in conjunction with these little gems would send me into a melty spiral questioning the integrity of ice cream photography.

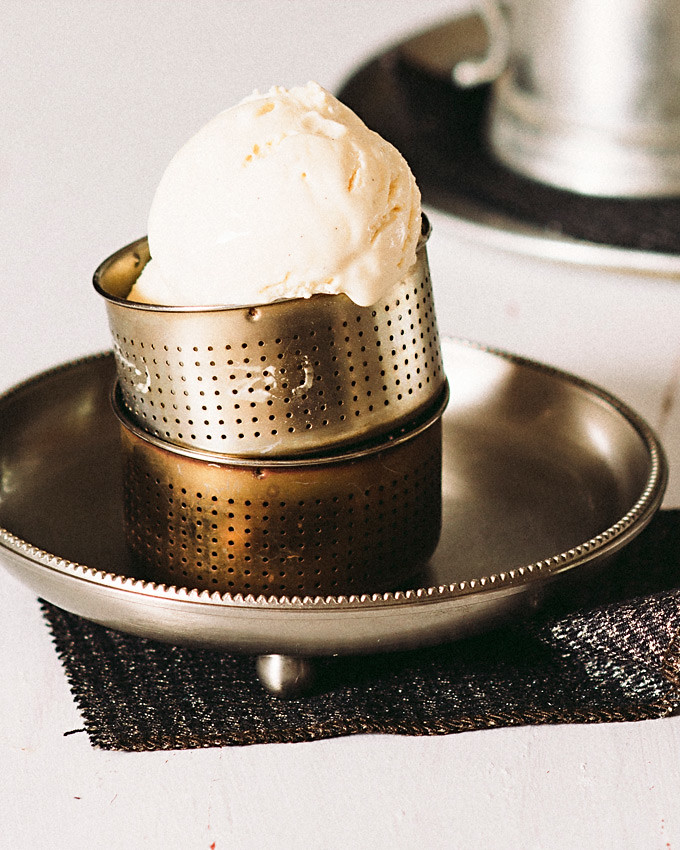
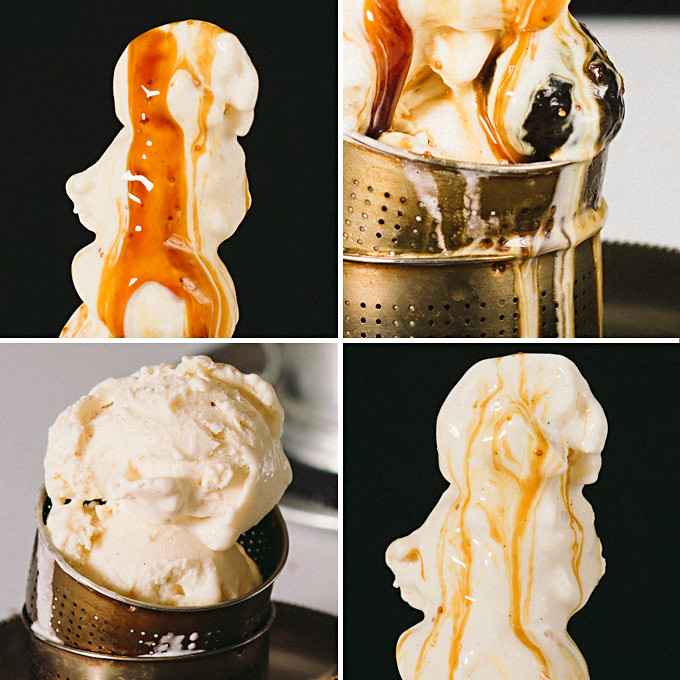
Here’s a thing some people don’t realise when gazing into a publication; when taking food photos the reality is ice cream melts. My personal reality is; I have no assistance and am often balancing on one leg to both take a photo and manoeuvre a reflector. My reality is; I have an incredibly small space to work with and even smaller backgrounds and surfaces. My reality is; by the time I stage the shoot, scoop the ice cream, position it properly, drizzle some syrup, clean my sticky hands and resume position behind the camera quick-as-a-flash (hehe pun) everything has already begun to topple. The texture of commercial ice cream we are so used to is lost in a matter of seconds; time is the nemesis of those who work alone, at least in this instance.

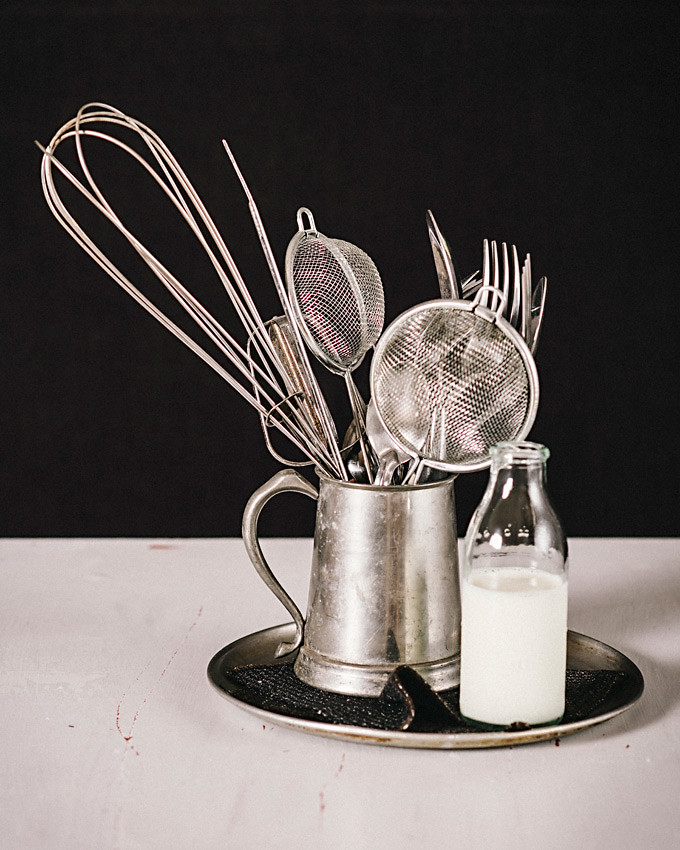
While I’m at it here’s absolutely everything there is to tell about these photos. The background is the back of a couch in the living room, the table is (I believe) an IKEA Lak I bought for $2 from The Bower; originally an offensive orange I painted it white but since the paint has begun to peel I’ve intentionally scratched it up for more character. I don’t have a macro lens; these were taken on my 85mm meaning I had to take a fair few steps back which, in turn, meant capturing areas outside of the table and background (couch). I wanted to keep my camera at f/2.8 (ish) for a bokeh explosion of shimmering pewter in the background however working with lights in a small space means they couldn’t be pushed back any further. The ice cream is sitting in what I can only describe as rusty canisters or filters I bought from Reverse Garbage ($1 for 10 of them as I remember), as were the pieces of fabric. The utensils in the background were purchased as part of my display at the COFA Annual late last year and that stein has been perched, untouched, on my coffee table in my bedroom ever since.

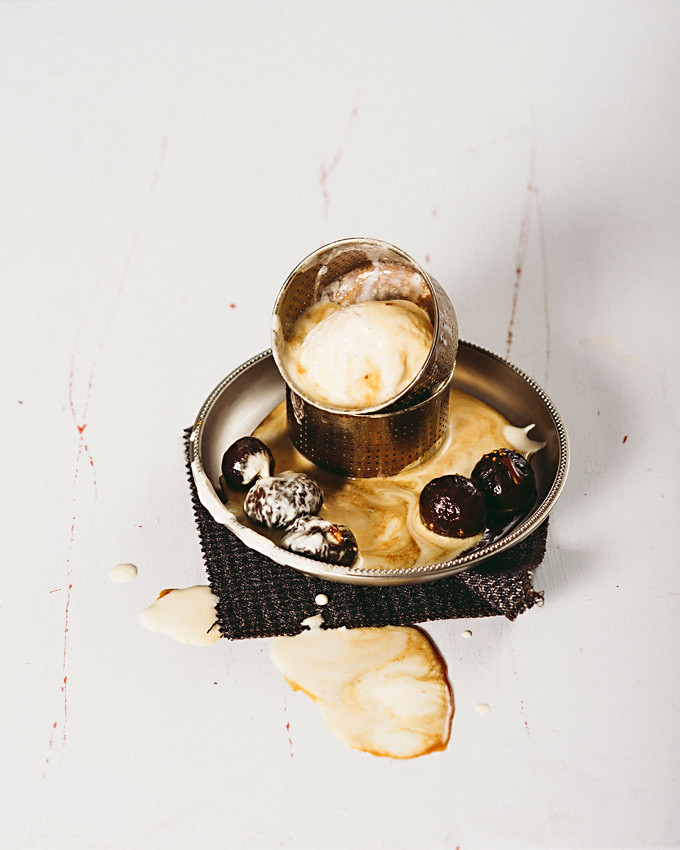
So, I became fed up with what ice cream should look like in the real world since I don’t operate in a real studio and decided to keep it as honest as possible. I stacked it high and watched it burn (melt) to the ground (restored IKEA table) and enjoyed it for a perverse thirty seconds. Hahahahaaa! I’m so zany I just don’t know what to do with myself. Some people rage at photoshopped images of women in magazines while I’m raging at faked ice cream.

Onto the recipe itself; the goat curd ice cream is a little different but great, probably not to everybody’s taste especially if they’re not into goats cheese. Don’t serve it by the bowlfull but instead as a course inbetweener or generous taster. It works perfectly with the figlettes and its syrup, though they’re definitely not essential. It’s not entirely sweet; just resounding flavours of goaty cheese and honey. It probably even warrants a quinelle. Whack it beside a soufflé and bask in the fanciness of it all.

Goat Curd + Honey Ice Cream
(an original recipe)

200g fresh goat curd (I used Meredith Dairy)
300ml cream
250ml milk
3 egg yolks
60ml (1/4 cup) honey
Tsp of salt
1 tbs sugar
1 vanilla bean
Jar of figlettes (optional)

1. Combine cream with goats curd until lumps are removed. In another bowl beat egg yolk with sugar.
2. In a saucepan heat milk, honey and split vanilla bean over low-medium heat until hot. Stir into egg yolk mixture slowly to temper then return to heat for a few minutes, whisking constantly until it begins to thicken like a custard.
3. Strain mixture into cream and goats curd mixture and stir well until combined. Place in fridge to chill and later churn as per your ice cream maker’s instructions. Serve with figlettes if you have any handy.

See the mess this stuff makes?! The concept of imperfection-as-perfection is far from revolutionary but goshdarnit melted ice cream is cool as heck. Cool and real.

And speaking of keeping it real, thanks again to Esme, Mark and Laura at Cream for the figlettes and please check out their online store or in person if you’re around the Dandenong area. My brief soap box moment of the day: supporting small businesses is very, very important; if you’re not already on that bandwagon get on it immediately, please!

Tags: , , ,

Cravings are weird, right?

Majority of my friends are travelling, or will be travelling in the coming weeks, so to curb my fuming jealously I’ve turned to thoughts of some past adventures yonder seas. In 2008/2009 I hung out in Europe for a couple of months as most 20 year olds do; a few memories of a brief stint in Paris include being rained on tremendously, being kicked out of a souveigner store when I asked the owner for directions, trying to hit on a cab driver with a little help from the ‘romance’ section of my French translation app, seeing many, many boobies at the Moulin Rouge, and, as terribly cliché as it may sound, enjoying a really fantastic French onion soup, or rather, soupe a l’oignon, in a little café.

Since that fleeting thought I hadn’t the will-power to force it out of my mind. MUST HAVE FRENCH ONION SOUP! In a huge coincidence my prayers were answered at dinner at El Circo a couple of weeks ago; an amazing blended soup with a dash of port graced our degustation menu. Mind blowing stuff. And since then it seemed anytime I turned on the TV this soup has been everywhere. Food Safari. MasterChef masterclass. Some other show I can’t remember. The pressure was building up behind my tastebuds; It was time to prepare a soupe a l’oignon of my own.

I began trawling through old photos after making this, and check it out, I found a photo of that soup I ordered in that little Parisian café almost four years ago! Mind you I wasn’t much of a photographer back then with my little Canon snapshot (other photos in this album include me posing idiotically before landmarks, flipping off the Mona Lisa and getting craycray in da club). Hahaha… ahh. Gross.

This recipe is rather rich (beef stock + alcohol + cheese!) and will serve 2 for main or 4 for a little entree. I’ve thrown everything into this one, large pot for all to share at the dinner table but serving them up individually is great for dinner parties too.

Soupe a l’Oignon
(an original recipe)

600g onion (around 4 medium-large), finely sliced
50g butter
2tbs flour
250ml beef stock
500ml water
2 sprigs thyme
Salt
60ml port
60g gruyère, grated
2 slices bread

1. In a large, heavy-based saucepan melt butter over medium heat. Add onions and stir until softened. Continue to cook over medium heat, stirring occasionally, for around an hour or until beginning to caramelise and brown.
2. Add flour to the onions and stir to cook for a few minutes. Add the stock, water and thyme and bring to the boil. Reduce heat and simmer for 30 minutes, adding salt to taste.
3. Preheat oven to 200°C. Place your bread under a grill to toast lightly.
4. Once the soup is ready add the port then carefully ladle into an oven-proof bowl. Add a third of the cheese, then the toasted bread, then top with the remainder of the cheese. Place in the oven for around 10 minutes or until cheese has melted and is deliciously blistered. Serve immediately.

Bon appétit!

Tags: , , , ,

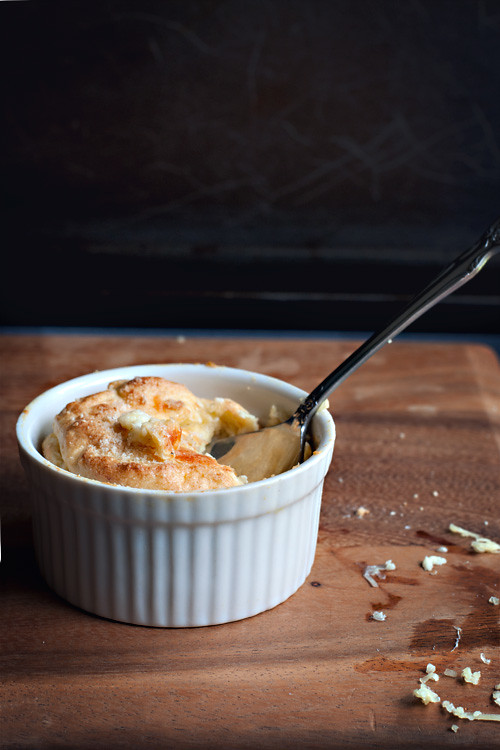
Cheese + Wasabi Soufflé

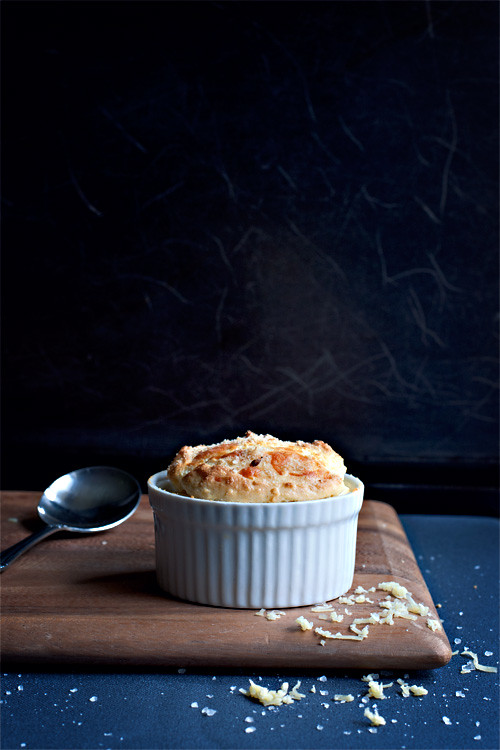
Last week in my usual university holiday, half-asleep, cooking-show-surfing television daze I discovered an ingredient I’d never heard of before; wasabi powder. Embarrassingly, my mind was blown. Finding intense flavours in powdered form is just so exciting as it’s a nice way to introduce wonderful, new flavours to food without destroying the science behind delicate pastries and such. I bought a little tin when I was out and about next but not before an encounter with a somewhat condescending staff member who insisted this powder would be “too super hot” for me (sigh, it’s so difficult being a pasty ethnic sometimes. I will teach you how to chili). I assumed I’d do the usual macaron thing with this stuff (stay tuned!) however I came up with a dish a little more relevant to my lunchtime hunger today.

Most cheeses would be fine in this; I used some cheddar as it was the only cheese I had at home (don’t judge… I cook for myself and not for my blog; I just happen to blog about my what I cook :}) but I’d recommend a nice pecorino, it should go down a treat. Maybe even something smokey. Who knows, go nuts with it!

Cheese + Wasabi Soufflé

Savoury soufflés are more forgiving then their sugar-dredged counterparts due to their naturally “lumpy” nature; a good thing for those who are a little daunted by making these. There’s no need for ultra-flat surfaces here! Just wonderfully rustic deliciousness. This recipe will make around 4-6 soufflés, depending on the size of your ramekins.

Cheese + Wasabi Soufflé

50g butter (plus more for greasing ramekins)
3 tbs flour
1 cup milk
1 cup grated cheese of your choice
4 eggs
2 tsp wasabi powder
Breadcrumbs
Salt to taste (this entirely depends on your choice of cheese)

1. Preheat oven to 190°C. Separate eggs into two bowls. Prepare ramekins by greasing with butter and dusting with breadcrumbs.

2. Place butter and flour into a small pot over medium heat until butter has completely melted, around a minute.

3. Add milk and stir continuously until the mixture pulls away from the pot. Reduce heat and add egg yolks one at a time, vigorously stirring until each is completely combined.

4. Remove from heat and add cheese, wasabi powder and salt and once again stir to combine.

5. Beat separated egg whites until peaks form. Add half to the cheese mixture and gently fold to combine. Repeat with the remaining egg white.

6. Carefully pour soufflé mixture into ramekins leaving 1cm from the top. Run your finger around the rims to tidy and ensure they will rise neatly. Top them with additional breadcrumbs and grated cheese, if you like.

7. Place ramekins on a baking tray and bake for around 20 minutes. Serve immediately!

Cheese + Wasabi Soufflé

Good lunch. Good day!

Tags: , ,