Spiced Banana Bread Stack with Pecan Brittle

You’ll have to forgive me, I’m not entirely sure what I’m blogging about.

Is it a loaf? Faux-pancakes? A funky little dessert plate fit for a café’s afternoon tea menu?

I really don’t know. But what I do know is that I can’t wait to sure my super moist spiced banana bread recipe with you! Although I give most store-bought banana breads the benefit of the doubt as to whether they use real bananas as opposed to artificial banana flavouring, too often I come across a slice that’s crazy doused in sugar. Now don’t get me wrong, sugar is my everything, however being a good (half) Cypriot girl I eat my bread and toast with honey and lots of it. So, in this recipe, I’ve substituted lashings of sugar for pinches of subtle spices. It’s not your average banana bread but who wants to eat average anyway? It’s a one-bowl recipe and dairy free too, so, shout outs to my pressed-for-time and lactose-intolerant bros.

Pecan Brittle

Oh yeah, then I made some pecan brittle and served it with a little marscarpone cream on my bread. I was styling this straight after eating lunch so I doubt I was in the correct mindframe to be dealing with this banana wonder. I’ve been spending a lot of time with my camera lately so I was probably desperate for a plate of tower-esque food to play with in Lightroom. Since I’m a little undecided on this you must, must let me know; does this stack look even remotely appetising? If not, it’s cool, ignore it and focus your attention on this nice loaf photo below. Okay? Okay. But do let me know please. Ahhhhhh.

Alana's One-Bowl Spiced Banana Bread

Alana’s One-Bowl Spiced Banana Bread
4 overripe bananas
2 cups flour
2 eggs
3/4 cup sugar
2 tsp baking powder
1 tsp bi-carb / baking soda
1/3 cup vegetable oil
1 tsp cinnamon
1/2 tsp ground ginger
1/4 tsp ground cloves

Pecan Brittle
1/2 sugar
1/4 cup water
1/3 cup roughly chopped pecans

For the Banana Bread
1. Preheat oven to 180°C.
2. Unravel overripe bananas and mash in a bowl.
3. Combine all remaining ingredients and beat until just combined.
4. Grease a loaf tin and fold a piece of baking paper over the edges (this makes it much easier to remove later). Bake for 1 hour and 20 minutes.
5. Allow to cool in tin for 10 minutes then remove and place on wire rack. Serve with honey, pecans and a cup of tea, OR…

For the Pecan Brittle
1. Prepare baking paper on an oven tray.
2. Place sugar and water in a small pan over medium heat and allow to boil until it begins to turn a slight amber colour. Give it a quick swirl, remove from heat and stir through chopped pecans.
3. Working quickly, pour mixture over baking paper and allow to cool. Once hardened, smash into shards.

To serve
1. Slice banana bread and, if you like, lightly toast. Stack and serve with a spoonful of lightly whipped cream or marscarpone and a sprinkling of pecan brittle.

Alana's One-Bowl Spiced Banana Bread

And there you have it, my spiced banana bread served two ways! How fancy.

Tags: , ,

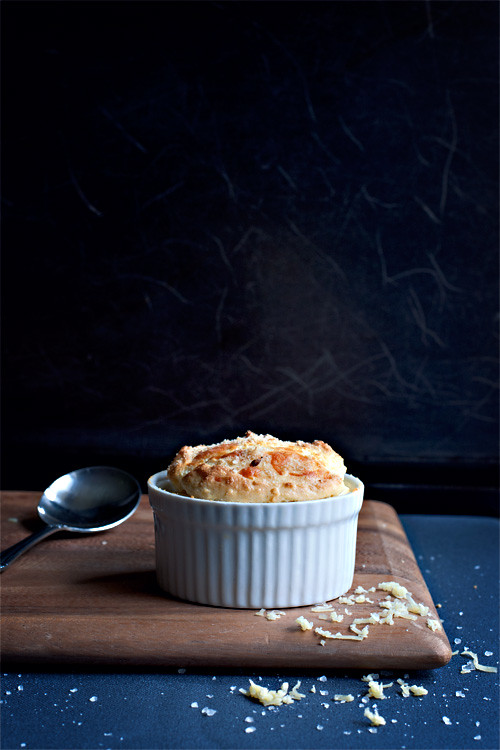
Cheese + Wasabi Soufflé

Last week in my usual university holiday, half-asleep, cooking-show-surfing television daze I discovered an ingredient I’d never heard of before; wasabi powder. Embarrassingly, my mind was blown. Finding intense flavours in powdered form is just so exciting as it’s a nice way to introduce wonderful, new flavours to food without destroying the science behind delicate pastries and such. I bought a little tin when I was out and about next but not before an encounter with a somewhat condescending staff member who insisted this powder would be “too super hot” for me (sigh, it’s so difficult being a pasty ethnic sometimes. I will teach you how to chili). I assumed I’d do the usual macaron thing with this stuff (stay tuned!) however I came up with a dish a little more relevant to my lunchtime hunger today.

Most cheeses would be fine in this; I used some cheddar as it was the only cheese I had at home (don’t judge… I cook for myself and not for my blog; I just happen to blog about my what I cook :}) but I’d recommend a nice pecorino, it should go down a treat. Maybe even something smokey. Who knows, go nuts with it!

Cheese + Wasabi Soufflé

Savoury soufflés are more forgiving then their sugar-dredged counterparts due to their naturally “lumpy” nature; a good thing for those who are a little daunted by making these. There’s no need for ultra-flat surfaces here! Just wonderfully rustic deliciousness. This recipe will make around 4-6 soufflés, depending on the size of your ramekins.

Cheese + Wasabi Soufflé

50g butter (plus more for greasing ramekins)
3 tbs flour
1 cup milk
1 cup grated cheese of your choice
4 eggs
2 tsp wasabi powder
Breadcrumbs
Salt to taste (this entirely depends on your choice of cheese)

1. Preheat oven to 190°C. Separate eggs into two bowls. Prepare ramekins by greasing with butter and dusting with breadcrumbs.

2. Place butter and flour into a small pot over medium heat until butter has completely melted, around a minute.

3. Add milk and stir continuously until the mixture pulls away from the pot. Reduce heat and add egg yolks one at a time, vigorously stirring until each is completely combined.

4. Remove from heat and add cheese, wasabi powder and salt and once again stir to combine.

5. Beat separated egg whites until peaks form. Add half to the cheese mixture and gently fold to combine. Repeat with the remaining egg white.

6. Carefully pour soufflé mixture into ramekins leaving 1cm from the top. Run your finger around the rims to tidy and ensure they will rise neatly. Top them with additional breadcrumbs and grated cheese, if you like.

7. Place ramekins on a baking tray and bake for around 20 minutes. Serve immediately!

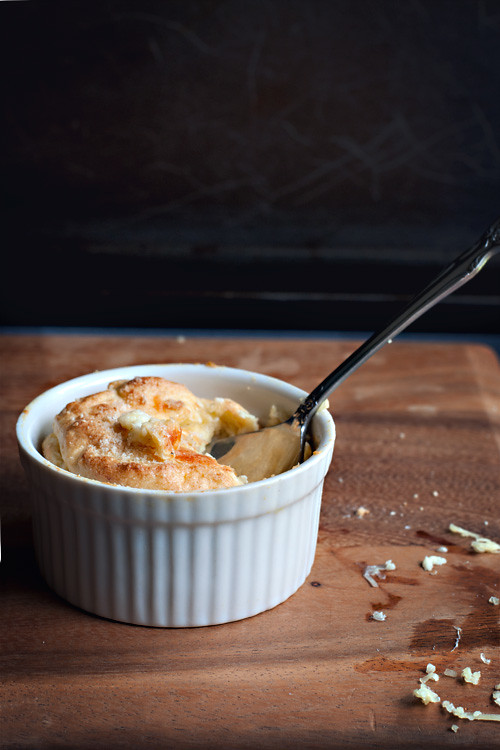
Cheese + Wasabi Soufflé

Good lunch. Good day!

Tags: , ,

Two Leek + Two Garlic Soup

To cut a long and possibly annoying succession of stupid anecdotes short; my weekend, this recipe and this post has been inspired by three things:

  • An enforced philosophy of shopping at farmers’ markets far more frequently and making as much as I possibly can from scratch,
  • Wanting to create my version of Campbell’s “Potato and Leek” soup in a can, my former comfort food as a broke student living out of home (eugh), and
  • Discovering a life beyond LEEKSPIN.

Two Leek + Two Garlic Soup

Needless to say this weekend was rather wholesome (with the exception of my frolicking around humming the Leekspin tune); riding my bike around yearning for the organic and simply homemade. And yes, a year ago I would often pine for Campbell’s Leek and Potato soup from a can, undeterred its goopy nature retaining its cylindrical shape as I attempted it pour it from the can into my little pot. It was like something from a cartoon.

Two Leek + Two Garlic Soup

Now, if I do say so myself, this leek soup is spectacular; so fragrant and naturally creamy. The garlic is present and rounded but in no way pungent so don’t be afraid to rock two whole bulbs. It’s one of those dishes where the ingredients truly speak for themselves. Whole roasting garlic bulbs is an absolute joy, as is preparing an aromatic chicken stock from scratch. Please note the stock recipe below will make around twice as much as you actually need for this soup; this stuff is golden and whether you refrigerate it for a week or freeze it for months you will always, always find an opportunity to use it. But, as usual, I digress. This recipe, aside from the extra stock, will serve 4 people who aren’t afraid to get their garlic on.

Two Leek + Two Garlic Soup


Two Leek + Two Garlic Soup

2 leeks

2 whole garlic bulbs

1L chicken stock (instructions below)

650g potato (around 4 medium sized)

100ml cream, plus more to garnish

1 tbs butter

Olive oil

Salt

A few slices of prosciutto (optional)


Chicken stock (makes twice as much as you need, around 2L)

1kg chicken wings (around 10)

2½ L water

2 large onions

3 sprigs thyme

2 bay leaves

10 peppercorns

2 tbs salt


For the stock (can be made a day ahead)

1. Cut onions in half leaving the skin on. Place all ingredients in a large pot and bring to the boil. For the next 15 minutes skim the scum that rises to the top with a ladle. Once it has cleared, turn down heat to a lower setting, pop on the lid and allow to simmer for 4 hours.

2. Strain chicken, onions and aromatics from the liquid. This stock can be kept in fridge or freezer until ready for use.


For the soup

1. Pre-heat oven to 200°C. Remove the ‘tops’ of the bulbs of garlic with a horizontal slice so that the cloves inside are exposed. Drizzle with olive oil, wrap in aluminium foil and place in the oven for 30 minutes. Remove, allow to cool and, with a firm hold of the base of the bulb, squeeze the soft, caramelised garlic into a small bowl. If you want to use prosciutto as a garnish, place the slices on a tray and bake for 10 minutes.

2. Remove the tops, or the darkest green leaves from the leeks. Slice the stalks in half and wash well (because leeks have many layers  there may be plenty of dirt and soil in there). Finely chop into small pieces.

3. Peel potatoes and roughly chop into 2cm cubes.

4. Heat butter and a drizzle of olive oil in a large pot. Add chopped leeks and stir until softened, around 10 minutes. Add the litre of stock, the cubed potatoes, the soft garlic and a teaspoon of salt. Combine, bring to the boil then reduce heat to medium. Cover and allow to simmer for 30 minutes or until the vegetables have softened significantly.

5. (The burn mark on my hand says be wary of this step!) In batches, pour the soup into a blender and process until smooth. Alternatively use a stick blender straight in the pot. Return to the pot on low heat and add cream.


To serve

1. Spoon ladlefuls of soup into a bowl. Add a dollop of cream, a piece of prosciutto and garnish with cracked pepper.

Two Leek + Two Garlic Soup

Served with some homemade malt and wholemeal bread this meme-inspired soup is absolutely one of the nicest dishes I’ve recently made. Do try it! I’m so excited by this recipe I wish I could personally deliver a bowl to every single person I know.

Tags: , , , ,

Domo Heart Cookies

I’ve always seen Valentines Day as a non-event in my life. Partnered or not, for a whole 25 years the spirit of red roses and overwhelmingly cute plush bears has never resounded within me on February 14. If you have a wonderful man or ladyfriend in your life to care for shouldn’t you try and make them feel special every single day of the year? Shouldn’t you want to make everyone in your life feel that way anyway? Yeah. Totes. So there’s no way I’d ever make something lame like heart cookies.

However.

I now run a recipe blog. Fate slapped me in the face when, whilst looking for old paints the other day, I came across a set of brand new, unopened graduated heart-shaped cookie cutters hidden in a mysterious box in the garage. And thus I found myself torn at the cross-roads of Valentines baking.

Admittedly I eyed off some pink food dyes and red sanding sugars and for a moment I thought I may have been turned. Nahhh jokes, what actually happened is that I went to my room to organise all of my Japanophile collectibles when, like divine intervention, inspiration struck in the form of beloved Domo Kun.

Domo Heart Cookies

To make these Domo heart cookies you’ll need:

  • A batch of sugar cookie dough + cocoa + red food colouring (Martha Stewart can help you out here)
  • One large heart shaped cookie cutter (for the body)
  • One small, rectangle cutter (for the mouth)
  • Black candy beads (for the eyes)
  • Royal icing (for the teeth). You could probably use white chocolate in lieu of this.

Prepare cookie dough as per Martha’s instructions. Remove around one quarter or one third of the mixture and place it in a smaller bowl with a few drops of food colouring and combine until it’s as red as you’d like (you may want to add another tablespoon of flour if it’s too wet from the colouring). With the remaining dough add just under 1/4 of a cup of cocoa and once again combine (if it’s a little crumbly add a teaspoon or two of milk until it reaches a similar consistency of the red dough). Wrap both your brown and red cookie doughs in plastic and place in the fridge for a few hours, or overnight, to chill. And now begins the fun part.

Domo Heart Cookies

1.Roll out your chocolate dough and make some hearts with your cookie cutter.

2. Take your small, rectangular cutter and make a hole in the centre of the heart for the mouth. Pop these in the freezer on a tray so they’ll hold their shape.

3. Meanwhile, roll out your red dough and cut some Domo mouths with the same, rectangular cutter (yes I used the base of a mini-grater, ingenious I know).

4. Remove your chocolate hearts from the freezer and replace the holes with pieces of the red cookie dough. Because the hearts have firmed up you’ll be able to press the malleable red dough into shape within the hole to avoid any gaps during baking.

5. Optional tip: take one of the candy beads and make imprints where the eyes should be. Although these will rise during baking they will still make a handy maker and crevice, much easier for applying later.

6. Bake in the oven at 180°C for 7-8 minutes and allow to cool. Prepare royal icing (or white chocolate). Use as glue to attach the candy beads as eyes.

7. Now this is where I became a little unstuck. Place more royal icing in a piping bag (mine was an awful, flimsy sandwich bag). I found the best way to illustrate the teeth was to draw two straight lines along the top and bottom of the mouth.

8. Create four little peaks or triangles with a toothpick, carefully nudging the mixture. (Do this quickly before it dries! I recommend doing steps 7 and 8 per cookie rather than striping them all then returning to adjust the teeth.)

Domo Heart Cookies

And there you go, fellow weeaboos! Please feel free to bake these and spread the Japanophile love (and please see below for some cross-processed Tumblr fodder to celebrate the occasion). Happy Valentines!

Domo Heart Cookies

PS. As I type this I feel incredibly ill. Like, super fever ill; hot and sweaty and achey and confused. Maybe it’s Valentines Fever. I caught it! :<

Chicken + Apricot + Ginger + Rosemary Tagine

One pot. Tender meat. Stone fruits, spice and honey. There a few things more delicious than a spicy chicken tagine.

Cous Cous

Rather than dousing everything in a variety of spices tonight I’ve opted for a different blend of flavours by marrying ginger with rosemary; a herb normally too pungent for chicken, but in this dish it is subtle, fragrant and wonderfully fresh. The beauty of this meal, and every variation of it, is that you can prepare it earlier in the day, pop the entire pot in the fridge and then re-heat it over the stove when you’re ready! It was also a nice opportunity to pick some fresh rosemary from the garden; our new plant being a recent gift from some family friends. This recipe will serve 4 people.

Rosemary Plant + Apricots

Chicken + Apricot + Ginger + Rosemary Tagine

1 kg chicken thigh fillet (8 pieces), sliced

3 tbs olive oil

1 large onion, diced

1 long sprig rosemary – 1/3rd finely chopped, the remainder cut in half

40 g fresh ginger, minced

2 red chillies, finely chopped (and de-seeded for the sensitive)

2 cinnamon sticks OR 1 tsp freshly ground ginger

2 tsp ground corriander seeds

3 tbs honey

200 g dried apricots, cut in halves

1 x 400 g can cherry tomatoes

Salt


Simple couscous

350 g couscous

1 tbs olive oil

Salt


To serve

Bunch of corriander

Handful of pinenuts

1. Prepare a tagine or heavy-based casserole over medium-high heat with olive oil. Add the onion, rosemary, ginger, chilli, cinnamon and corriander seeds and stir until fragrant.

2. Add the chicken pieces and cook until golden brown.

3. Add the honey, dried apricots, rosemary sprigs, cherry tomatoes and salt and stir to combine. Cover your tagine/pot with the lid and allow to simmer for 15 minutes or until chicken has cooked through.

4. Remove lid and continue to simmer until the liquid has reduced to a sticky glaze (around 20 minutes).

5. To prepare the couscous pour grains into a heat proof bowl and (just barely) cover with boiling water. Add oil, salt and quickly cover with plastic wrap. Allow to sit for 10 minutes to absorb the water. Remove plastic and fluff the grains with a fork.

6. To serve place chicken tagine and couscous in separate, large dishes. Adorn with chopped coriander and pine nuts


Chicken + Apricot + Ginger + Rosemary Tagine

Thank you, Morocco – where would our tastebuds be without you?

Tags: , , , ,

Poached Eggs + Avocado on Toast

Sydney Inner-West living. Girls on Tumblr. Cafés and iPhones. What do these four things have in common? They’ve heightened the trendy awareness of the delightful combination of eggs and avocado. I say this without the least hint of cynicism… promise.

Poached Eggs + Avocado on Toast

It only occurred to me last week I had never poached an egg in my life, and,  being only two weeks shy of turning 25, this was something that needed to be rectified immediately. Avocado on toast is one of life’s most wonderful pleasures (especially combined with egg, a meaningful love of my life). With this tasty breakfast we’re able to skip the dairy-middle-man as the avocado operates in lieu of butter whilst poaching runny eggs in a dash of vinegar denies any need for over-creamy scrambled eggs (a true pet hate of mine). The bread I’m using is, uhh, Tip-Top 9 Grain something-something, if I recall correctly. No fancy sourdoughs here, this is just happy, healthy and honest breakfast cooking for one; there’s no better way to begin a Saturday morning in my eyes (or stomach)!

Poached Eggs + Avocado on Toast - Process


Poached Eggs + Avocado on Toast

2 slices of bread of your choosing

2 eggs

2 tbs vinegar

1 avocado

Salt + pepper


1. Prepare your avocado by halving, scooping the flesh out with a spoon and slicing into wedges. Prepare a small bowl of cold water. Crack your first egg into another small bowl.

2. Fill a wide pot with water, add vinegar and heat until simmering. With a slotted spoon swirl the water in one direction to create a little whirlpool effect. Carefully pour your egg into the centre of the whirlpool and allow to cook for 2 1/2 minutes for a runny yolk (try a little longer if you prefer your eggs a little firmer).

3. Once your egg is ready carefully remove with a slotted spoon and place into the bowl of cold water to stop the cooking process. Prepare your other egg with the above process. To warm them up again, place in another clean pot of warm water and allow to stand for 30 seconds to a minute. Remove once again with a slotted spoon and allow to drain on a plate lined with paper towels. Place your bread in the toaster, or under a grill, for a minute or two.

4. Arrange sliced avocado on toast and sprinkle with salt. Carefully place a poached egg on each slice and season with cracked pepper.

Poached Eggs + Avocado on Toast

Poached Eggs + Avocado on Toast

And now I’m ready to face the day.

Tags: , ,

Salted Spiced Beer Caramels

A few weeks ago I enthusiastically jumped aboard my beer-wife high-horse and purchased a dozen Brewdog There Is No Santa beers. In retrospect this was a little strange as traditionally I only revel in beers that taste overwhelmingly of fruit and unfortunately this purchase was no exception to my girly tastebuds; despite its charming notes of cinnamon and spice I could only bring myself to drink the one.

Salted Spiced Beer Caramels

However with my glass (stein?) half-full I chose not to see this as a frivolous purchase but as an opportunity to adapt this wonderful beer to the culinary world.

Salted Spiced Beer Caramels

Drawing inspiration from my Framboise Caramels I hoped to achieve a similar chewy and delicious beer-based morsel. With the addition of of some spice to heighten the essence of this micro-brewed Christmas beer you’ll have salty, sweet, buttery, bitter and spicy flavours partying all up and around your mouth. And isn’t this what flavoured caramel is all about?

Salted Spiced Beer Caramels

Shout outs to all fellow beer and candy fans. Oh, and to people who own candy thermometers, shout outs to you too. Seriously! Please don’t try this recipe without one; unless you are Lord of the Fluke the consistency of the caramel won’t turn out as nicely as you’d like so just don’t. Please? Ok good. I’m only harsh because I care. Mwa mwa! This recipe makes around 40 caramels, depending on the size.


Salted Spiced Beer Caramels

(an original recipe)


1x 330ml bottle spiced beer (I used Brewdog’s There Is No Santa)

2/3 cups cream

2 tbs sea salt flakes + more for garnish

1 tsp cinnamon

1 tsp ground ginger

1/4 tsp ground cloves

1 1/2 cups sugar

1/3 cups corn syrup / glucose

120g butter, cubed


1. Pour beer into small pan and simmer over medium heat until reduced to 1/3 cup. This should take around 20-25 minutes. Place in fridge (or freezer) to cool.

Salted Spiced Beer Caramels

2. Line a square tin with baking paper. Once your reduced beer has cooled combine with cream, salt, cinnamon, ground ginger and ground cloves. Stir well.

3. Combine sugar and corn syrup over low heat until dissolved. Increase heat until syrup has caramelised – 112°C on your candy thermometer. Do not stir during this process or the syrup will crystallise.

4. Remove from heat and slowly pour in your cream mixture, stirring quickly as you do so. Be careful has the concoction will try to splutter everywhere. Continue to stir to break up the caramel ball formed whilst adding the cubed butter. Don’t worry if you’re unable to dissolve everything.

5. Return to low heat and stir frequently until the temperature reaches 120°C on your candy thermometer.

6. Pour caramel into prepared tin and allow to cool slightly. Sprinkle with rock salt and allow to cool completely – either overnight on your kitchen bench or in the fridge to speed up the process. Cut into small squares and wrap with baking paper, twisting at the ends like traditional candies. Sprinkle with more rock salt if desired.

Salted Spiced Beer Caramels

BRB, MAKING AN APPOINTMENT WITH THE DENTIST (and possibly AA).

Tags: , , , ,

HAPPY BIRTHDAY, DAD!!! WOOOO, YEAH! ETC! Making this cake was too much fun, albeit a little rushed as I only had the morning to prepare it. My self-imposed brief was to create a cake based on his favourite desserts: chocolate, pandan (a new discovery thanks to yours truly) and maltesers. Needless to say it was going to be fantastic (idiotic) from the very start.


The look on his face was priceless when I brought it out. And there’s nothing like cutting into what seems like a chocolate cake only to find BRIGHT GREEN.

The pandan cake is my white-girl version, no authentic pandan leaf here unfortunately! I assure you it’s fantastic though and may even be a nice, celebratory cake to bust out for New Years! Just throw some sparklers and gold leaf on there or something. This recipe will make two 9-inch rounds to stack.

Pandan + Chocolate Ganache Birthday Cake

(an original recipe)

Pandan Cake

1 1/2 cups plain flour

1 1/2 cups self-raising flour

200 g butter, room temperature

2 cups sugar

4 eggs, room temperature

1/2 cup buttermilk

1/2 cup coconut milk

1 1/2 tsp pandan paste


Chocolate Ganache

350 g chocolate, roughly chopped

150 ml cream

Pinch of salt


Assembly

1x jumbo pack Maltesers

2x Flakes

Strawberries


For the pandan cake

1. Preheat oven to 180°C.

2. Beat butter until it begins to cream and pale. Add the sugar and continue to beat until combined and fluffy.

3. Add the eggs one at a time beating after each addition. Add the self-raising flour, butter milk, plain flour, coconut milk and pandan paste once again beating after each addition.

4. Divide between two greased 9-inch cake tins. Rap the pan by dropping it from a small height to knock out any air bubbles.

5. Place in oven and bake for around an hour or until the tops spring back when touched (don’t be alarmed if the cakes crown too much – they can be trimmed back later). Allow to cool for 15 minutes, carefully remove from tins, wrap in plastic and allow to cool completely.


For the chocolate ganache

1. Heat cream in a pan, or in the microwave, until hot. Pour in roughly chopped chocolate and salt and stir until the pieces have completely melted into a smooth, velvety ganache. Allow to cool in the fridge.


For the assembly

1. Once cakes are completely cool trim the tops so they’re nice and even. Place one on your cake stand. Pipe ganache over the top to create an even layer then top with the remaining cake. Pour some ganache over the top (the consistency shouldn’t be too runny or too stiff) and, with an offset spatula, gently encourage it over the sides of the cake. Continue this process until the cake is completely covered using the spatula to smooth around the edges.

2. Whilst the ganache is yet to set, arrange Maltesers around the base of the cake as pictured above (a three-tiered diagonal pattern), or any way you wish. Create a Malteser border around the top of the cake and adorn with broken Flakes and strawberries. Place cake in the fridge to set and once ready to serve bring to room temperature.

I’ve seen so many beautiful photos on other people’s food blog capturing a gorgeous slices of cake – there’ll be none of that here unfortunately as this is what happens when a man cuts and serves cake for everybody.

Hahahahah! Oh well. Happy Birthday, Dad! I love you.

Tags: , ,

Festive Peppermint Hot Chocolate

It’s been one of those days. I’m wearing odd socks. I’ve uttered the term “IDGAF” to so many people today I am properly offending my very own sensibilities.

I demand COMFORT FOOD. And yes, anytime I type this phrase it is always in CAPITAL LETTERS ‘cos it’s kind of a BIG DEAL.

Festive Peppermint Hot Chocolate

I toyed with the idea of buying a mint pattie for myself earlier today at the supermarket for a split second, a decision I would live to regret; on the way home I was flooded by a remorse so deep I may have shed a teeny-tiny tear. Ravaged by this soul-destroying guilt I foraged around the pantry and found some leftover candy canes from my gingerbread house building venture a few days ago. I was craving peppermint and chocolate so badly I was willing to cast off the shackles of soy-based-beverage oppression that so constantly plagues my delicious lifestyle. The rest, as they say, is history. Quick, easy history.

Festive Peppermint Hot Chocolate

Festive Peppermint Hot Chocolate

The candy cane serves as lovely stirring utensil if you’re one to take your time enjoying a mug of hugs. If you’re in the company of anyone who doesn’t particularly enjoy peppermint however (a most unfortunate affliction) the candy cane can always be omitted as it is the sole source of peppermint in this recipe.

Festive Peppermint Hot ChocolateThis recipe follows my golden rule of cookery; where this is chocolate there must be salt. It’s basic ying and yang! This recipe will serve one comforting mug or two smaller shots if you’re in a generous, sharing mood.


FESTIVE PEPPERMINT HOT CHOCOLATE

(an original recipe)

3/4 cup milk

50 g chocolate (I used half dark, half milk)

pinch of salt

1 or 2 candy canes, curve removed


1. In a heat-proof bowl microwave milk until it is very hot (around one minute).

2. Chop your chocolate and once the milk is ready add to bowl and stir until melted and combined (a few flecks of chocolate may remain). Add salt.

3. Pour into glasses and adorn with can upside-down candy cane.

Festive Peppermint Hot Chocolate

Now, somebody please tell my brother if he doesn’t arrive home soon I’m drinking his for him.

Tags: , ,

It’s December! Which marks this month as my very first Christmas as a recipe/food/baking/WHATEVER blogger – all photography from here on in will feature GREEN, RED, CUTENESS, SPARKLES, BAUBLES, etc etc.

Tonight I’m off to an annual Christmas  dinner with my old school friends. Traditionally we give each other small, cute gifts. Last year I made some sugar cookies and fudge however to celebrate this blogging landmark as a vaguely serious baker I figured it was time to step up my game.

At first I was dubious of baking with such a wintery flavour in (what should be) the beginning of Summer here in Sydney however thanks to much unprecedented and rain below-average temperatures I had no qualms whatsoever getting my gingerbread on. This recipe should make around 20-25 macarons, depending on the size.

GINGERBREAD MACARONS

(an original recipe)

 Gingerbread Shells

100g egg whites, room temperature

100g almond meal

200g pure icing sugar

30g caster sugar

1 tsp powdered egg whites

1 heaped tsp ground ginger

Powdered/gel colouring

White Chocolate Ginger Ganacahe

200g white couverture chocolate, chopped

100ml pouring cream

1/2 tsp cinnamon (plus extra for dusting)

1/2 tsp ground cloves

2 tsp ground ginger

2-3 lumps of crystallised ginger (around 10g), finely chopped


1. Preheat your oven 150°C.

2. Sift pure icing sugar, almond meal and ground ginger and place into a bowl and give it a quick stir.

3. Beat eggwhites and eggwhite powder in a separate bowl until soft peaks form. Slowly add the caster sugar, beating well between each addition, until eggwhites are stiff and glossy. This process should take around 5-10 minutes.

4. Pour half of your dry ingredients and colouring (I used half brown half orange gel colour) into the bowl of beaten eggwhites and combine with a flat utensil, like a spatula, using “cutting strokes”. Once incorporated repeat with the remaining icing sugar and almond meal mixture. This is where things begin to get a little tricky as under-mixing or over-mixing will ruin your macarons as they attempt to rise and “grow feet” in the oven. Experts say to stir the mixture until it becomes the consistency of lava. The mixture will be sticky but you’ll know it’s ready when, upon holding your spatula above the bowl, it will begin just begin to flow freely back into the bowl. You’ll need to knock a lot of the air out of it.

5. Prepare a piping bag with the appropriate tip (around 1 cm or less), a baking tray with baking paper, and pipe small rounds (they must be small enough to balance on the cupcakes!). If there are any small lumps left from piping wet your finger and gently press them down (unlike cake batter, macaron mixture does not flatten out when in the oven). Dust some extra cinnamon over the shells and allow tray to rest for 30 minutes.

6. Place baking tray in the oven and allow to bake for around 15-20 minutes (this time will depend entirely on your oven, so keep an eye on them). Within 5 minutes or so they will begin to grow feet.

7. Once ready, remove from oven, and after 5 minutes transfer to cooling racks.

8. Whilst your shells are cooling place your cream in the microwave for 30 seconds or until relatively hot. Pour your chopped chocolate into the bowl and stir continuously until the chocolate has melted and the mixture is combined. Add cinnamon, ground cloves, ground ginger and finely chopped crystallised ginger and stir to combine. Place bowl into the refrigerator to cool and thicken.

9. Prepare another piping bag with a large tip and neatly pipe rounds of ganache into half of the shells. To close, gently place its partner shell on top of the ganache and twist shut, taking care to prevent ganache spilling over the edges.

As well as these macarons I’ve also bundled some of my berry and vanilla infused vodka in adorable little jam jars complete with mini baubles (a fluke discovery at Coles this morning!) – a cute reminder that a cocktail-fueled Summer is just around the corner… maybe.

Sugar and alcohol. Spice and berries. Here’s hoping they like my little edible trinkets!

Tags: , ,

« Older entries § Newer entries »