Savoury Meals

You are currently browsing the archive for the Savoury Meals category.

Rosemary poached apricot and wine poached pear crostini

Imagine telling our famished ancestors that some people these days create plates of food just to improve their SEO. “Oh, this isn’t a plate, it’s an enamelware prop“. “Can I eat yet?”, “no! I need to take a photo!”

I’m not one for profound reflection but if 2013 has taught me anything it’s that of the fine art (and dark art) of the facade.

I write in my about section that the “true value of food as a homely and generous act” is perhaps being lost amongst 1) the desire to articulate every single thing we cook, and 2) the need to document every single thing we eat. Articulation takes time whereas hot food on a plate has a considerably short shelf life as we collect our thoughts and adjust the settings in our cameras.

We’re shrouded in duplicate information of the hottest new Sydney spots and are bombarded with images of staged food. Occasionally people who make food at home for themselves/friends/family choose not to live in the delicious moment and instead place a board behind their dinner, delicately locate a fork at a whimsical angle and take a photo. Sometimes if the food goes cold it goes into the bin.

I’ve been guilty of this myself, though less so than I used to, so I understand, but I find the whole “recipe blogging” process irritating if it becomes a wasteful act.

Cutlery shopping is now “prop sourcing”, whipping up something new is now “recipe developing” and I feel the whole scene is becoming too self important with a disregard of spontaneity and generosity which, with food, is really important.

So my faux-revalation for the coming year is; keep it real and drop the act and facade of stylised food. Once in a while ditch the props, don’t worry if your photo isn’t perfect and relish in the now of documenting how things look rather than how you’d like them to look as you’re sharing them. Don’t listen to what you’ve heard, using flash can be awesome (Vice, are you listening?? I’m cool. Somebody’s even throwing up their rude finger in one of these photos). By all means go snap happy, just don’t berate your friends for eating a dish you generously prepared for them because you need to style it with a different spoon. Hands look better in food photos anyway and honest images speak volumes alongside the constantly artificial and staged.

SO! Here are some crostini I prepared for NYE (sans toasting, no time and too much effort); wine poached pears with a holy trinity of cheese and rosemary poached apricots with ricotta. They’re not heaps beautiful of typically photoworthy but that’s ok! My friends enjoyed them and that’s all that matters. Someone even shouted “ALANA ARE YOU BLOGGING?!” from the balcony as some flash spilled from the kitchen, and that’s ok too, because I was only “blogging” for a few seconds. Happy 2014.




For the poached rosemary apricots
Collect some generous sprigs of rosemary for your backyard (or local store). Dissolve a cup of sugar in four cups of water in a pan over a stove and allow the rosemary to infuse. Meanwhile halve the apricots and remove the pips. Simmer in the rosemary syrup for around 5 minutes and transfer to a baking dish with a slotted spoon. Sprinkle with some caster sugar and place under a hot grill until tops are burnished. Meanwhile, reduce the poaching liquid and you’ll have a nice rosemary syrup to use for drinks and other things. Assemble by spreading ricotta on some sliced baguette, then an apricot half, then some fresh rosemary leaves.

For the wine poached pears and cheese
Dissolve three quarters of a cup of sugar in some nasty red wine you have floating around the house in a saucepan and add three sliced pears to simmer. Once tender (15ish minutes), remove with a slotted spoon and allow to cool. Combine 150g of cream cheese, 200g of feta and 80g of stinky stilton into a holy trinity cheesy spread (these are approximate measurements, add to taste). Assemble by spreading stinky goodness on bread then adoring with a couple of pieces of sliced pear.

Tags: , , , , ,

…aka the Three Cheese Delight aka Cheeses of My People Tart aka Baby Don’t Kiss Me. It’s the Ottolenghi recipe so good even Martha Stewart is onto it. C’mon, let’s get quaint with this caramelised garlic tart.

My friend Andrew hosted a potluck birthday party this weekend (HAPPY BIRTHDAY ANDREW!) and this was my contribution. This tart is my first recipe cooked blind (no pastry pun); I’m on a diet due to some near startling health news (nothing serious but from what I recall the doc said my veins were clogged with pure Nutella and I must be cleansed) so I’m keeping to a strict diet for a few weeks/months/who know until I’m better and possibly more attractive-er. With a blindfold wrapped firmly around my tastebuds held together only by fickle willpower I was unable to indulge in the stinky delights of this tart however my friends said it was nice and the minuscule lick I enjoyed over dinner seemed balanced, so, good times? This tart heats up really well too; I prepared it the day before the party and warmed it in the oven at Andrew’s place for around 10 minutes before serving.

The three cheeses of my people element comprises of feta, haloumi and kefalograviera (possibly my fav cheese of all time) to form the cheesey holy trinity of my ethnic background. If you don’t have access to this fabulous array try using one bitey, one mild and one… whatever the heck you like. Or just whack some goats cheese in there, oldschool. Keep it to around 240g and try to include both soft and firm cheeses.

Caramelised Garlic + Three Cheese Tart
(adapted from Ottolenghi)
2 sheets puff pastry
2 large heads of purple garlic, cloves peeled
1 tbsp olive oil
1 tbsp balsamic vinegar
220ml water
1 tbsp caster sugar
1 tsp chopped rosemary
1 tsp chopped thyme, plus a few whole sprigs to finish
100g Bulgarian feta
80g haloumi, grated or roughly chopped
80g kefalograviera or kefalotyri, roughly chopped
2 eggs
200ml cream
Salt and pepper

1. Preheat oven to 180°C. Line a round tart tin with puff pastry and refrigerate for 20 minutes. Once chilled blind bake in the oven for 20 minutes being sure to weigh down the case with pie weights (or in my case some beans). Remove weights and bake for another 10 minutes until begin to golden.
2. Blanch garlic by boiling the cloves for 3 minutes. Strain well, return pan to heat and add olive oil. Once hot add the garlic cloves and fry for a couple of minutes. Add balsamic vinegar and water and simmer for 10 minutes. Add the sugar, rosemary, thyme and a pinch of salt and continue to simmer until the liquid has almost entirely evaporated (around 10 minutes).
3. To assemble the tart sprinkle haloumi at the bottom of the tart case followed by the kefalograviera then crumble the feta on top. Arrange caramelised garlic cloves over the cheese. Whisk the eggs and cream with some salt and pepper and gently pour over the tart. Season with cracked pepper and sprinkle with thyme leaves.
4. Reduce heat to 160°C and return tart to oven for around 45 minutes or until the top is golden and set. Remove from tart tin and serve with a whole sprig of thyme to garnish.

Tags: , , ,

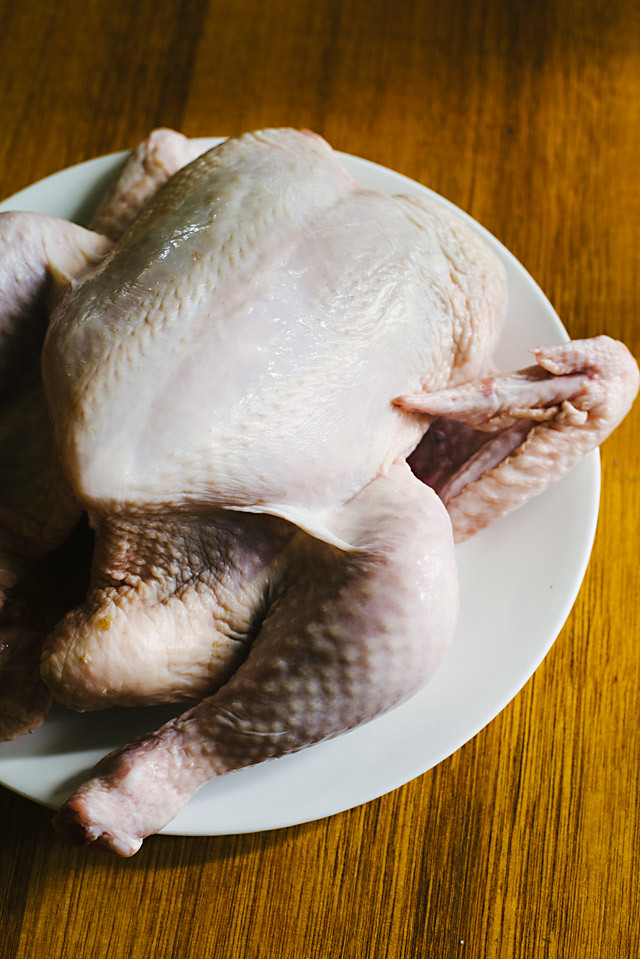
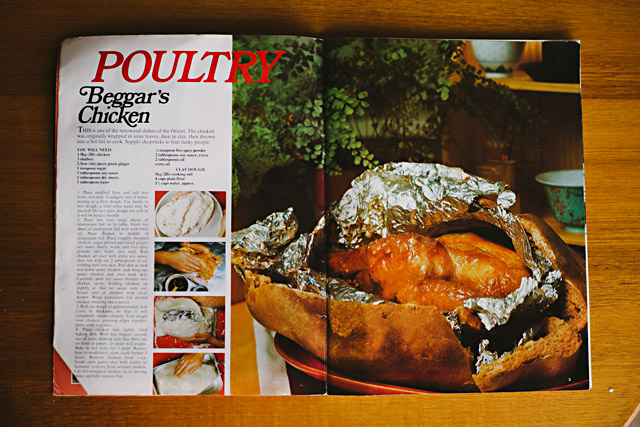
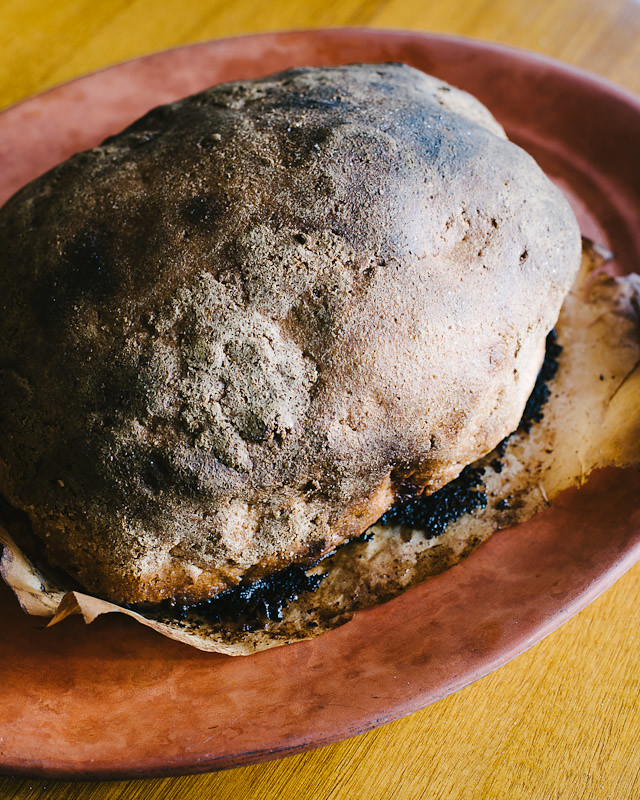
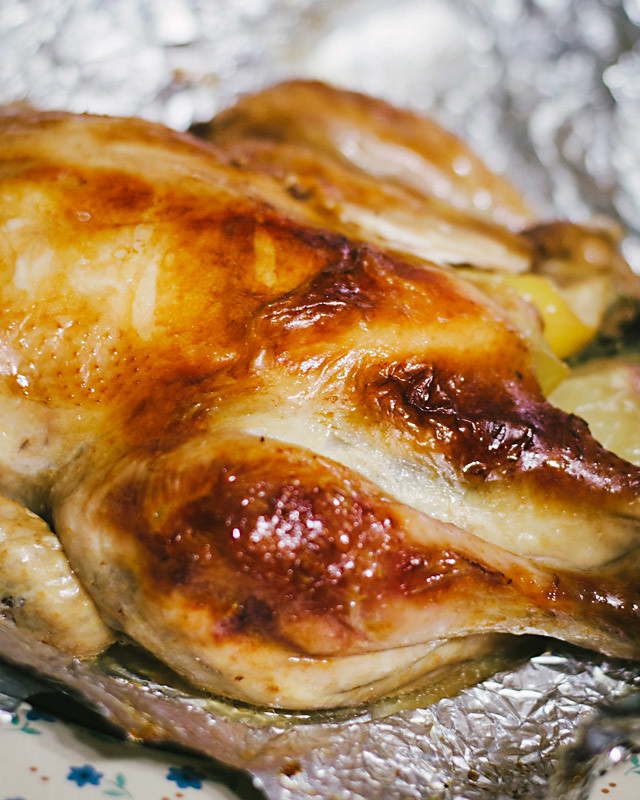
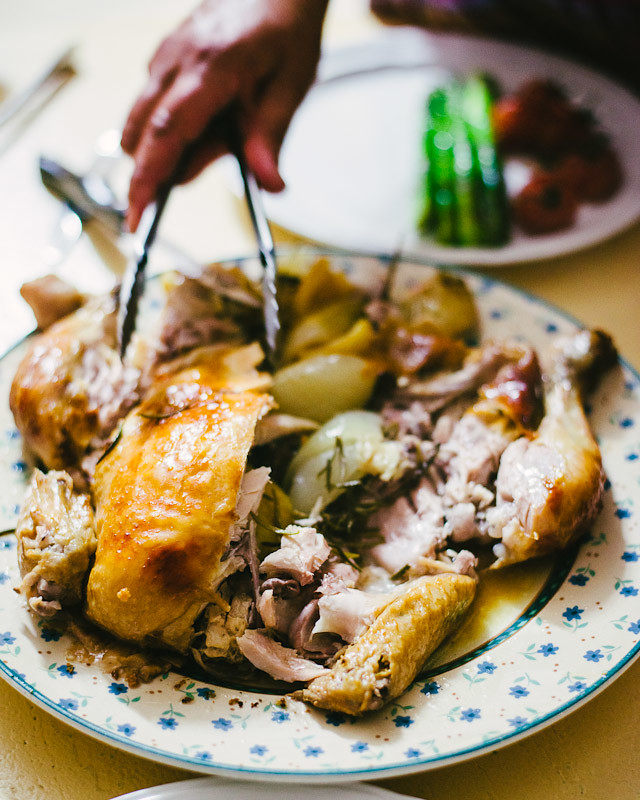
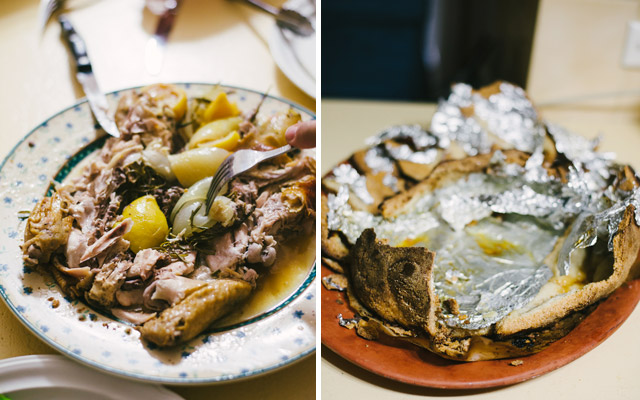
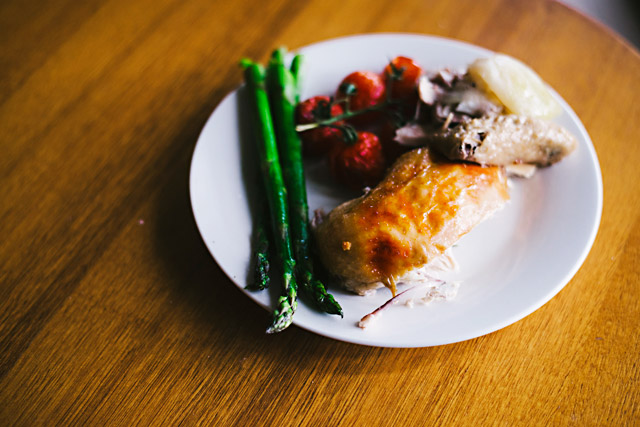
I’m keeping it honest + simple today (actually I’m anxiously hovering over the publish button because my photos are crazy casual, oh my gosh) with a few photos illustrating one of my favourite dishes at a child; salt dough chicken. My mum only prepared the dish a few times but the spectacle of taking a chisel to a dough-encrusted bird was enough to retain those happy, tasty memories until today. Did anybody see those nerdburgers on #mkr prepare their salt-crusted trout? I’m pretty sure they were doing it wrong; this is how to do it right. The Women’s Weekly Cooking Class Cookbook taught me how. It states… “This is one of the renowned dishes of the Orient.”

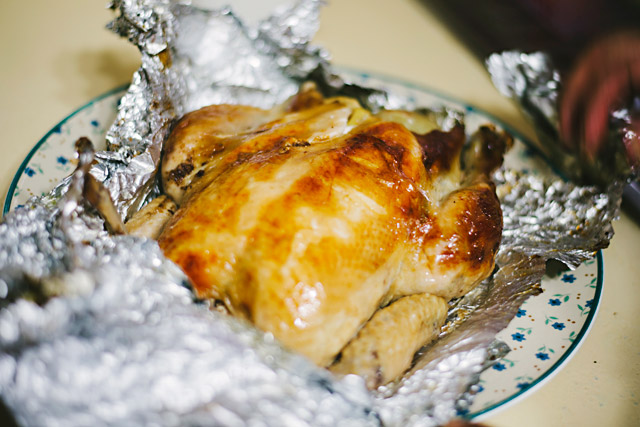
*tugs collar*, yikes. Well, to pay homage to, um, “the Orient” as well as retaining my delicate Australian-wog sensibilities I’ve prepared the chicken by shoving lemon and rosemary up its arse then brushing the bird with kecap manis (can be substituted with soy sauce and sugar). Wrap your beloved chook in foil and salt dough and bake for four hours. It’s like cooking a chicken inside an oven inside an oven inside an oven (inception chook). Crack open your make-shift oven for a meal of melting-off-the-bone chicken. Delicious, noble, comforting bird; you’re the best.

The other day my mum said something very interesting; “why has ‘communal eating’ become such a fad lately? It’s like all of a sudden people decided it’s nice to eat together”. NICE ONE MUM. I lack the eye for refined plating as dishes upon dishes, complete with mismatched tongs, served in the centre of the table for all to enjoy has been the norm for as long as I can remember. Individual plates with perfect towers of food were never commonplace in my upbringing and this chicken dish respects this mentality by being so deliciously ugly it cannot possibly be transformed into a fine dining work-of-art. Do your best to transfer it out of the salt dough (that sucker’s gonna crumble) and let everybody dive in and grab their favourite piece. It’s how we’re meant to enjoy food.

Since this dinner was made for my family last night the luxury of taking my time with staged photos was nonexistent with a hungry audience present; as aforementioned here are some honest (read: dodgy) snaps from a tasty dinner in the Dimou household. Recipe follows after the jpg assault.

Salt Dough Chicken
(based on Beggar’s Chicken from the Women’s Weekly Cooking Class Cookbook)

1 whole chicken
1 lemon
1 onion
2 cloves garlic
2 sprigs rosemary
3 tbs kecap manis
Salt
Olive oil

Salt dough
1.5kg salt
6 cups plain flour
2 1/2 cups water

1. Pre-heat oven to 250°C. Combine all salt dough ingredients and knead until dough comes together and set aside.
2. Prepare baking tray with parchment paper and aluminium foil (or both to be safe like I did). Quarter lemon and onion, roughly crush garlic and place in cavity of the chicken. Brush with kecap manis and sprinkle with salt. Place chicken on foil that’s been brushed with olive oil and wrap tightly in a couple of layers. Roll out salt dough, one half at a time, and wrap the foiled chicken. Wet your fingertips to smooth over and fill any gaps.
3. Bake in the oven for one hour, turn down heat to 170°C and bake for another 3 hours.
4. Remove from oven. With a chisel and hammer gently tap away at the salt dough until you’re able to carefully extract the chicken (warning: SUPER HOT). Place on serving platter and enjoy.

Tags: ,

Welcome friends to my Middle Eastern and completely photo-heavy extravaganza of a post! The very nice people at Essential Cuisine were kind enough to send me a wonderful basket of goodies last week to participate in a little friendly cooking competition to put their new range of gourmet stocks to good use. Although I completely and utterly dig making stock from scratch when I have the time the reality is sometimes we’ve all just got too much on and unfortunately a lot of supermarket substitutes just won’t suffice. I think these guys have tapped into a much desired and appreciated niche of the home cooking world.

My food genre of choice for this challenge is Middle Eastern since 50% of my genes hail from Egypt. Obviously these dishes aren’t strictly Egyptian but our general mentality has something to do with a lot of spice, sweetness and FLAVOUR. How awesome is flavour?! Prettyyyyy, pretty good.

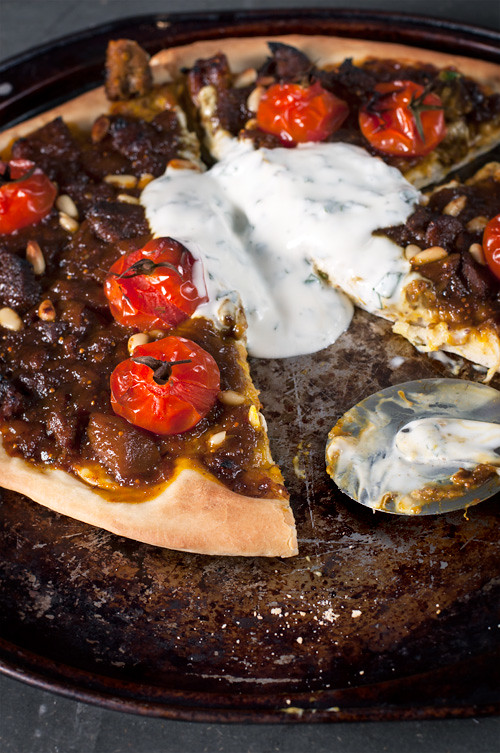
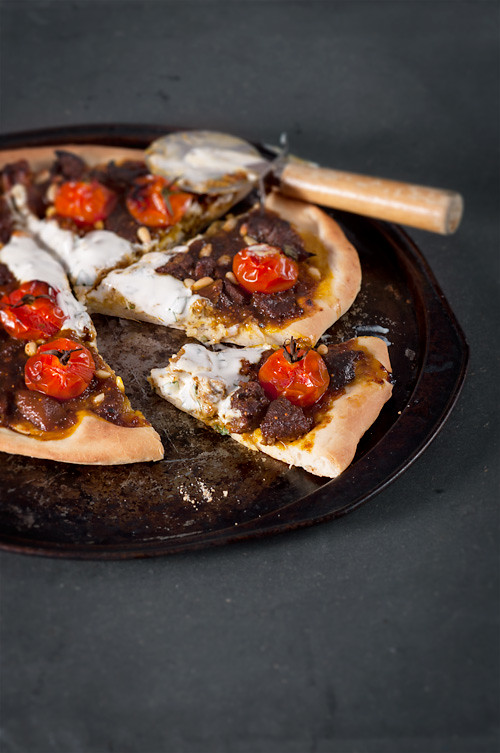
The original plan was to have four recipes up for you all to try however, most unfortunately, this crazy week involving too much work and a computer crash (!!!) has contributed to the demise of a few folders of images, mystery dish included. It’s a massive shame because it’s mighty fine! I promise to re-shoot and get it up as soon as possible because I’m sure you’re going to love it. And if you don’t… come at me bro. So in lieu of my disasterously hectic week I’ve come up with three publishable dishes! Firstly is a Lamb, Fig and Date Pizza. Oh my gosh. Since this challenge was about being creative I thought “why not throw a tagine on a pizza?!” Genius. You don’t even need to make, or add, pizza sauce. When I made it for my family the other night their faces literlly melted off… really truly. I had some for lunch and dinner and my brother polished off the leftovers for breakfast the following day. It’s seriously good. I also have a couple of sides; Buttery Pomegranate Couscous and Spiced, Roasted Chickpeas, they’re like ethnic wasabi peas! The couscous would have made a little more sense with the other dish I was going to post, but, yeah. Massive apologies again. :(

And, as always, I am always photographing for my book project so without further adieu, here’s a whole lot of photos!

Lamb + Fig + Date Pizza with Minted Yoghurt (makes 3 pizzas)
Lamb Tagine
3 tsp cumin
2 tsp crushed corriander seeds
1 tsp tumeric
1/2 tsp ground ginger
1/2 tsp saffron powder
1 tsp salt
1 tsp fennel seeds
3 tsp cardamon pods, seeds removed
2 tsp peppercorns
1 cinnamon quill
2 onion
3 cloves garlic
30g fresh ginger, grated
1 kg diced lamb (I used leg)
250ml lamb stock
50g dried dates, chopped
80g dried figs, chopped
2 tbs (heaped) honey
Olive oil

Pizza Dough
14g (2 sachets) dry yest
1 1/2 cups warm water
4 cups flour
1 tsp caster sugar
1 tsp salt
60ml olive oil

Assembly
Truss of fresh cherry tomatoes
1 cup natural yoghurt
Handful of finely chopped mint
Handful of pinenuts

For the lamb tagine
1. In a mortar and pestle crush the fennel seeds, cardamon and peppercorns. Combine with the rest of the spices. Dice onion, finely slice the garlic and mince the fresh ginger.
2. Drizzle olive oil in a large pot over medium-high heat. Add the onion, garlic and ginger and cook through, continually stirring, until beginning to soften (around 5 minutes). Add the spices and cinnamon quill and, once fragrant, add the diced lamb. Once it is nicely browned pour in the lamb stock and add the dried dates and figs. Turn the heat down, cover and allow to simmer for an hour.
3. Remove the lid and add the honey. Bring heat up to a vigorous boil for a few minutes to reduce the liquid. It needs to be of a thick, stewy consistency as this will also double as the pizza sauce. Once ready, decant to a shallow bowl and break up the lamb pieces with two forks, roughly shredding.

For the pizza dough
1. Combine warm water with yeast, sugar and salt. Cover and allow to stand for 5 minutes in a warm area. If the mixture does not become frothy discard and start again.
2. Add yeast mixture to flour and knead on a lightly floured surface for 10 minutes. Roll into a ball, cover with a damp towel and allow to rest in a warm place for 30 minutes. The dough should double in size.
3. Punch the dough to remove air and knead for a couple of minutes. Divide into thirds and roll out as pizza bases.

For the assembly
1. Preheat oven to 200°C. Place truss tomatoes on a baking try and roast for 20 minutes. Remove and turn up oven to 250°C.
2. Place pizza bases on a baking tray and divide the lamb tagine between them, leaving a border of a few centimetres. Sprinkle with pine nuts and dot with cherry tomatoes once removed from the truss. Bake in the oven for 10 minutes or until dough is browned and cooked through.
3. Combine yoghurt with mint and dollop in the centre of the pizzas.

Buttery Pomegranate Couscous
1 cup couscous
1 cup chicken stock
1 tsp ground cinnamon
1 tsp ground corriander seeds
1 tsp salt
1 tbs butter
1 pomegranate, deseeded
Chopped coriander (optional)

1. Heat chicken stock in a saucepan until just beginning to boil. Place couscous, spices and salt in a heatproof bowl and pour over the warmed stock. Cover immediately with plastic wrap for 5 minutes. Gently fluff the couscous with a fork and stir in the butter. Sprinkle with pomegranate seeds and chopped coriander.

Roasted + Spiced Chickpeas
375g dried chickpeas
2 tsp paprika
2 tsp ground corriander seeds
2 tsp cumin
2 tsp sumac
2 tsp chili flakes (optional)
2 tsp salt
50ml olive oil

1. Pour dried chickpeas in a bowl and cover with double the amount of water. Leave to soak overnight.
2. Preheat oven to 180°C. Drain chickpeas into a large saucepan. Cover with water and boil for an hour or until beginning to tender.
3. Decant into a bowl and toss through spices, salt and olive oil. Move to a baking tray and bake for 1 hour, stirring the chickpeas occasionally to ensure they’re cooked consistently. Serve with a sprinkling of paprika.

Phew! I hope your monitors have survived this epic lamb pizza post. I promise to post up that mystery recipe soon as well with another Middle Eastern inspired dessert I prepared very soon. Thanks again to Essential Cuisine for allowing me to try their stock! You guys are just too cool for pushing me to create such tasty things for my family.

Tags: , , , , , , , ,

Cider Pulled Pork on Apple Crisps

A few weeks ago I received the sweetest delivery; some darling Pink Ladies from Aussie Apples! So this is a somewhat delayed post due to the unfortunate demise of my mandolin. RIP, old, orange friend! I’ve had to wait a couple of weeks to acquire a new one. It’s so super fancy, so fancy in fact that it nearly cut my finger off. Awww yeah.

Cider Pulled Pork on Apple Crisps

Resisting the urge to transform these apples into some kind of dessert (because I really ought to grow up and get my savoury on a little more often) I thought… h’ordeuvres are cool, right? Wonderfully miniature food you can knock back in one mouthful. So, what pairs well with apple? Pork! Ohh, but the whole pulled pork thing is so overdone these days. Why don’t I throw some roasted apple in there to mix it up a bit? Hmm. No. WAIT! I’ll place the pork ON THE APPLE AS LITTLE, EDIBLE PLATES AND IT WILL BE GREAT! And lord knows I love making fruity crisps. And so it was done. Well, the pork was… then my mandolin broke… so I had to wait, my mind heavy with h’ordeuvre love for a few weeks.

Cider Pulled Pork on Apple Crisps

Last time I prepared pulled pork I doused my slow-cooker with beer, which was awesome, but incredibly rich. I considered a 50/50 combination of beer and apple juice until I realised cider would be a much better idea. Thankfully I have a few bottles of homebrewed cider sitting in my room. It’s… not the greatest tasting beverage (why did I use a dry wine yeast to make a fruity cider?!) but it’s ultra-tang makes it very special for cooking. Salty, cidery pork with a sweet, crunchy, apple aftertaste is my idea of fantastic treat.

Cider Pulled Pork on Apple Crisps

I can’t wait to make this for a super funtime party soon. This should make around 60 pieces.

Slow Cooked Cider Pulled Pork on Apple Crisps
(an original recipe)

Apple crisp
3 apples

Cider pulled pork
600g pork chops or shoulder
1 onion, diced
3 cloves garlic, minced
2 tbs paprika
2 tbs cumin
2 tbs crushed coriander seeds
1 diced onion
1 cup apple cider
1 tbs mustard
2 tbs chili flakes (optional)
1 tsp dried thyme
Splash of worcestershire sauce
Splash of soy sauce
Salt
Olive oil

Assembly
A few spinach leaves
Dried thyme
Chili flakes (optional)

For the apple crisp
1. Slice apples on the thinest setting on a mandolin. Preheat oven to 80°C. Lay slices on a baking tray lined with parchment paper and allow to dehydrate in the oven for 2 1/2 hours, turning once halfway through. Once ready, remove from trays and allow to cool on wire racks.

NOTE: This can be done a day ahead. If you find the crisps a little on the limp side the following day you can always re-crisp them in the oven for a few minutes.

For the slow cooked cider pulled pork
1. Combine spices with a little salt and rub into pork pieces. Prepare your slow cooker with a splash of olive oil, and it if has a browning option, add onion and garlic and cook for a few minutes until fragrant. Add pork pieces to brown. Add the cider and other ingredients, turn on the slow cooker option and leave to cook for 6 hours. Check every 1 1/2 hours to turn the pork.

2. Once the pork is tender and cooked through remove pork onto a chopping board and decant juices into a saucepan. Discard any bones. Place over medium-high heat and reduce until halved. Meanwhile, gently break up the pork with two forks (you don’t need to be too thorough) and place into the saucepan of reduced pork juice. Continue to stir and break up the meat until it has reduced a little more; you want the pork to be moist but not too soupy. Remove from heat.

NOTE: This can also be done a day ahead; once prepared from the slow cooker you can separate both meat and juice and refrigerate (or even freeze) for a couple of days until you’re ready. This also provides an opportunity to skim off any fat that may solidify on the surface.

For the assembly
1. Because the apple will curl slightly in the oven, place the crisps the right way up so they stand like a little bowl. Place a small, or a piece of, spinach leaf over the crisp to cover the gap where the core and seeds once were. Top with a generous pinch of pork followed by a sprinkling of dried thyme and chili flakes.

Cider Pulled Pork on Apple Crisps

Mouthfuls of pure happy, these are. I do hope you’re able to try them! GET SOME PORK ON YOUR FORK! And thank you again to Bite Communications and Aussie Apples for the apples. Support your local growers!

Tags: , , , , ,

Cheese + Wasabi Soufflé

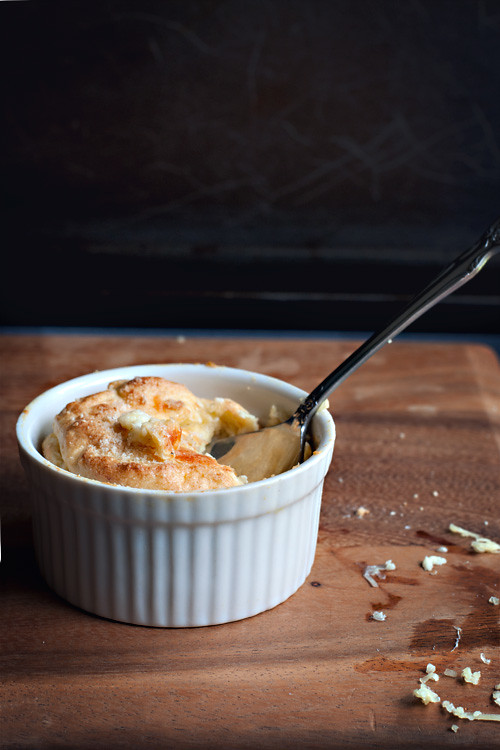
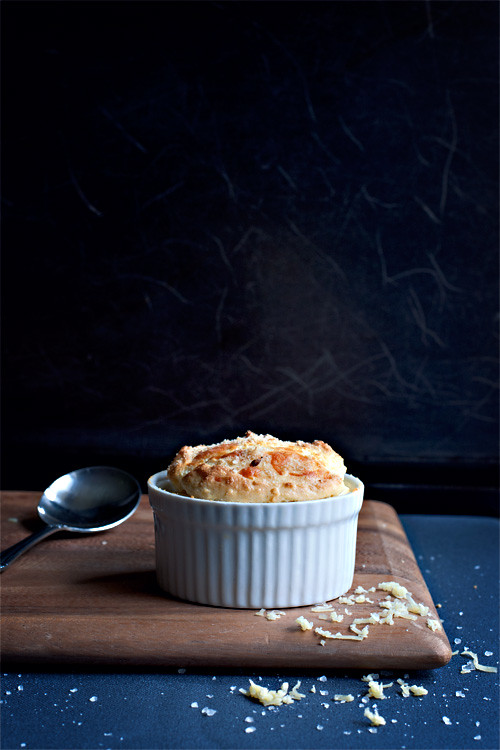
Last week in my usual university holiday, half-asleep, cooking-show-surfing television daze I discovered an ingredient I’d never heard of before; wasabi powder. Embarrassingly, my mind was blown. Finding intense flavours in powdered form is just so exciting as it’s a nice way to introduce wonderful, new flavours to food without destroying the science behind delicate pastries and such. I bought a little tin when I was out and about next but not before an encounter with a somewhat condescending staff member who insisted this powder would be “too super hot” for me (sigh, it’s so difficult being a pasty ethnic sometimes. I will teach you how to chili). I assumed I’d do the usual macaron thing with this stuff (stay tuned!) however I came up with a dish a little more relevant to my lunchtime hunger today.

Most cheeses would be fine in this; I used some cheddar as it was the only cheese I had at home (don’t judge… I cook for myself and not for my blog; I just happen to blog about my what I cook :}) but I’d recommend a nice pecorino, it should go down a treat. Maybe even something smokey. Who knows, go nuts with it!

Cheese + Wasabi Soufflé

Savoury soufflés are more forgiving then their sugar-dredged counterparts due to their naturally “lumpy” nature; a good thing for those who are a little daunted by making these. There’s no need for ultra-flat surfaces here! Just wonderfully rustic deliciousness. This recipe will make around 4-6 soufflés, depending on the size of your ramekins.

Cheese + Wasabi Soufflé

50g butter (plus more for greasing ramekins)
3 tbs flour
1 cup milk
1 cup grated cheese of your choice
4 eggs
2 tsp wasabi powder
Breadcrumbs
Salt to taste (this entirely depends on your choice of cheese)

1. Preheat oven to 190°C. Separate eggs into two bowls. Prepare ramekins by greasing with butter and dusting with breadcrumbs.

2. Place butter and flour into a small pot over medium heat until butter has completely melted, around a minute.

3. Add milk and stir continuously until the mixture pulls away from the pot. Reduce heat and add egg yolks one at a time, vigorously stirring until each is completely combined.

4. Remove from heat and add cheese, wasabi powder and salt and once again stir to combine.

5. Beat separated egg whites until peaks form. Add half to the cheese mixture and gently fold to combine. Repeat with the remaining egg white.

6. Carefully pour soufflé mixture into ramekins leaving 1cm from the top. Run your finger around the rims to tidy and ensure they will rise neatly. Top them with additional breadcrumbs and grated cheese, if you like.

7. Place ramekins on a baking tray and bake for around 20 minutes. Serve immediately!

Cheese + Wasabi Soufflé

Good lunch. Good day!

Tags: , ,

Chicken + Apricot + Ginger + Rosemary Tagine

One pot. Tender meat. Stone fruits, spice and honey. There a few things more delicious than a spicy chicken tagine.

Cous Cous

Rather than dousing everything in a variety of spices tonight I’ve opted for a different blend of flavours by marrying ginger with rosemary; a herb normally too pungent for chicken, but in this dish it is subtle, fragrant and wonderfully fresh. The beauty of this meal, and every variation of it, is that you can prepare it earlier in the day, pop the entire pot in the fridge and then re-heat it over the stove when you’re ready! It was also a nice opportunity to pick some fresh rosemary from the garden; our new plant being a recent gift from some family friends. This recipe will serve 4 people.

Rosemary Plant + Apricots

Chicken + Apricot + Ginger + Rosemary Tagine

1 kg chicken thigh fillet (8 pieces), sliced

3 tbs olive oil

1 large onion, diced

1 long sprig rosemary – 1/3rd finely chopped, the remainder cut in half

40 g fresh ginger, minced

2 red chillies, finely chopped (and de-seeded for the sensitive)

2 cinnamon sticks OR 1 tsp freshly ground ginger

2 tsp ground corriander seeds

3 tbs honey

200 g dried apricots, cut in halves

1 x 400 g can cherry tomatoes

Salt


Simple couscous

350 g couscous

1 tbs olive oil

Salt


To serve

Bunch of corriander

Handful of pinenuts

1. Prepare a tagine or heavy-based casserole over medium-high heat with olive oil. Add the onion, rosemary, ginger, chilli, cinnamon and corriander seeds and stir until fragrant.

2. Add the chicken pieces and cook until golden brown.

3. Add the honey, dried apricots, rosemary sprigs, cherry tomatoes and salt and stir to combine. Cover your tagine/pot with the lid and allow to simmer for 15 minutes or until chicken has cooked through.

4. Remove lid and continue to simmer until the liquid has reduced to a sticky glaze (around 20 minutes).

5. To prepare the couscous pour grains into a heat proof bowl and (just barely) cover with boiling water. Add oil, salt and quickly cover with plastic wrap. Allow to sit for 10 minutes to absorb the water. Remove plastic and fluff the grains with a fork.

6. To serve place chicken tagine and couscous in separate, large dishes. Adorn with chopped coriander and pine nuts


Chicken + Apricot + Ginger + Rosemary Tagine

Thank you, Morocco – where would our tastebuds be without you?

Tags: , , , ,

Poached Eggs + Avocado on Toast

Sydney Inner-West living. Girls on Tumblr. Cafés and iPhones. What do these four things have in common? They’ve heightened the trendy awareness of the delightful combination of eggs and avocado. I say this without the least hint of cynicism… promise.

Poached Eggs + Avocado on Toast

It only occurred to me last week I had never poached an egg in my life, and,  being only two weeks shy of turning 25, this was something that needed to be rectified immediately. Avocado on toast is one of life’s most wonderful pleasures (especially combined with egg, a meaningful love of my life). With this tasty breakfast we’re able to skip the dairy-middle-man as the avocado operates in lieu of butter whilst poaching runny eggs in a dash of vinegar denies any need for over-creamy scrambled eggs (a true pet hate of mine). The bread I’m using is, uhh, Tip-Top 9 Grain something-something, if I recall correctly. No fancy sourdoughs here, this is just happy, healthy and honest breakfast cooking for one; there’s no better way to begin a Saturday morning in my eyes (or stomach)!

Poached Eggs + Avocado on Toast - Process


Poached Eggs + Avocado on Toast

2 slices of bread of your choosing

2 eggs

2 tbs vinegar

1 avocado

Salt + pepper


1. Prepare your avocado by halving, scooping the flesh out with a spoon and slicing into wedges. Prepare a small bowl of cold water. Crack your first egg into another small bowl.

2. Fill a wide pot with water, add vinegar and heat until simmering. With a slotted spoon swirl the water in one direction to create a little whirlpool effect. Carefully pour your egg into the centre of the whirlpool and allow to cook for 2 1/2 minutes for a runny yolk (try a little longer if you prefer your eggs a little firmer).

3. Once your egg is ready carefully remove with a slotted spoon and place into the bowl of cold water to stop the cooking process. Prepare your other egg with the above process. To warm them up again, place in another clean pot of warm water and allow to stand for 30 seconds to a minute. Remove once again with a slotted spoon and allow to drain on a plate lined with paper towels. Place your bread in the toaster, or under a grill, for a minute or two.

4. Arrange sliced avocado on toast and sprinkle with salt. Carefully place a poached egg on each slice and season with cracked pepper.

Poached Eggs + Avocado on Toast

Poached Eggs + Avocado on Toast

And now I’m ready to face the day.

Tags: , ,

Welcome to the most versatile dinner you’ll ever meet. Brought to you by my impromptu dinner tonight you can use this in salads, tacos, um, salads…

Okay, maybe it’s not that versatile but it’s deliciously simple. Get some Donna Hay philosophy up ya.

Lime + Oregano Chicken Salad 

(an original recipe)

250 g sliced chicken thigh

1 tbs dried oregano

1 lime

salt

1 tsp olive oil

1 tsp crushed ginger

1 baby cos lettuce

1 tbs labna*

*natural greek yoghurt is fine as a substitute

1. In a bowl marinate your chicken with the oregano, salt and juice of one lime. Refrigerate for 30 minutes.

2. Place oil in a small pan and allow to heat up until smoking. Place ginger and chicken pieces carefully without allowing any juice to enter the pan – this is so the chicken brown and chars. After the chicken shows some colour pour in marinade and stir until cook entirely – this should take less than 10 minutes.

3. Remove chicken from heat. Line a small bowl with baby cos lettuce leaves. Place the chicken and adorn with a generous spoon of labna.

Inspired by my last post you can even make miniature san choi bao. Awww!

Tags: , , ,

So, how good is lettuce? The correct answer: SUPERDUPER AMAZEBALLS! Behold its gentle quiff of crunchy goodness. Thank you nature for gracing us with these wonderful, edible, miniature bowls of delight.

It’s easy to categorise Asian style dishes as “easy” for all the wrong reasons however sang choi bao can be prepared by anyone. Why? It’s nearly impossible to burn this mince. When beginning to brown it creates its own juices – and with the addition of the sauces you’d have to step away from the kitchen for a long while for something drastic to go wrong so as far as cooking steez goes this one’s a winner.

Pork Sang Choi Bao

(an original recipe)

500 g minced pork

1 large iceberg lettuce

1 tbs sesame oil

1 tbs garlic, minced

2 tbs ginger, minced

40 g dried shitake mushrooms (fresh is also fine)

1/3 cup oyster sauce

2 tbs soy sauce

1 tbs sugar

1 1/2 cup sliced shallots

1. Place dried shitake mushrooms in a bowl and cover with warm water for 30 minutes to soften.

2. Divide your lettuce into individual leaves, careful not to puncture or tear.
3. In a large pan heat sesame oil. Add garlic and ginger and stir until fragrant – around 5 minutes.

4. Add pork and continue to stir until the meat has become brown and separated – there can’t be any pink.

5. Add shitake mushrooms, oyster sauce, soy sauce and sugar. Incorporate well then add shallots.

6. Carefully spoon the sang choi bao mixture into individual lettuce leaves. Alternatively, place mixture into a bowl and place at the center of the table and allow your dinner guests to spoon in themselves.

 But watch out… it gets a little messy.

Tags: , ,

« Older entries